Wednesday, May 31, 2006

I'm so excited....

I have signed up for my first cooking class....homemade pasta and some sauces....at Sur La Table in Pentagon Row! Yippee....I have made my own pasta, a few times actually, but each time it's different, so an official class will help that out. I can't wait!!!! End of June.

And with that, I have succeeded in all my 2006 goals...before the year is officially half over!

Go Me...I'm a rock star!!!

Tuesday, May 30, 2006

God Bless France

I say praise the French. Hallelujah!

After several years of cooking, I have tried my first true Julia Child recipe, one pulled from Mastering the Art of French Cooking. As you might imagine, it really is all about the sauce, hot damn!

Ahhhh....help.....callll 9...1.........1!!!

OK, sauce induced heart attack over, yes there is one cup of heavy cream and 5 tablespoons of butter...big deal....moving on.

Yummy, pretty easy....and I'm so going to make it again!

Suprêmes de Volaille Achiduc
Chicken Breasts with Paprika, Onions and Cream

Serves 4

2/3 cup finely minced white onion
5 TB butter
1 TB fragrant red paprika
1/8 tsp salt

4 Suprêmes
1/2 tsp lemon juice
1/4 tsp salt
Big pinch white pepper

1/4 cup chicken stock
1/4 cup port, Madeira, or dry white vermouth
1 cup whipping cream
Salt & Pepper
Lemon juice as needed
2 TB minced parsley

Preheat the oven to 400 degrees.

Drop the minced onions into boiling water for 1 minute. Drain, run cold water over them, and drain again. Cook the onions with salt, paprika and butter in a covered casserole for about 1o minutes over very low heat until the onions are tender and translucent, but not browned.

The onions, butter and paprika!

Meanwhile rub the suprêmes with drops of lemon juice and sprinkle lightly with salt & pepper.

Bring the butter to a high simmer, allowing the butter to foam. Quickly roll the suprêmes in the butter, place a lid on the casserole, leaving it slightly askew and place in hot oven. After 6 minutes, press the top of the suprêmes with your finger. If still soft, return to oven for a moment or two. When the meat is springy to the touch, it is done. Remove the suprêmes to a warm platter and cover while making the sauce.

Return the casserole to the stove over high heat. Pour the stock and wine into the casserole with the cooking butter and boil down quickly until the liquid is syrupy. Stir in the cream and boil down again over high heat until the cream has thickened slightly. Off heat, taste carefully for seasoning and add a few drops of lemon juice to taste. Pour the sauce over the suprêmes, sprinkle with parsley and serve at once.

Voilá! My precious, rich, delicious, decadent lovely!

OK, so you've been asking...suprêmes? Basically, those are boneless skinless chicken breasts! Those silly French! (Love you!)

NOTES:
The onions are boiled, I'm assuming to slightly cook them, but mostly to remove some of the sulfuric compounds that make onions bitter and you cry. I cooked them, it was fine, but I feel just soaking/rinsing in cold water accomplishes mostly the same thing...I do that when I make salsa and it works well....so my suggestion, no need to boil the onions, soak in cold water for a few mintues, and rinse.

My suprêmes actually took 20 minutes. Perhaps my oven wasn't hot enough. I wasn't worried, and wasn't in a rush...my rice still needed to finish!

Speaking of the oven and casserole...I used my medium sized oven safe skillet. I don't have a casserole that can go on the stove. I think Julia could have been referring to a Dutch oven, but that doesn't sound too French. My skillet worked very well!

I used a dry chardonnay, as I don't have port, Madeira or vermouth. I think it was fine.

I forgot to put a little lemon juice in at the end. It might have been more exciting, but it was still great without. And the lemon juice sprinkled on the suprêmes...I'm not sure that made much difference. I wouldn't worry if you dont' have lemon juice.

And I didn't have parsley, but since that is just a garnish, no worries.

Also, served this with plain rice...if I had the forsight, I would have prepared a basic risotto to go along with this. Sadly, that probably would have killed me! I would have died happy though


Sunday, May 28, 2006

Don't forget the jicama

In the most recent issue of Fine Cooking (#79-July '06), I was pulled in by an article on chopped salads. This suprised me because I'm not really a salad person. I get cravings for salads, but they usually include romaine lettuce, croutons, carrots and chicken. The photos were what really drew me in...and the more I looked, the more I knew I had to try to make on of the salads.

I give you:
Chopped Mexican Salad
with Roasted Peppers, Corn, Tomatoes & Avacado
Serves 8

Chopped Salad sans dressing

For the Peppers & Corn
2 large orange bell peppers
2 ears fresh corn
1 TB extra virgin olive oil
Salt & Pepper

For the Honey-Lime-Cumin Vinaigrette
1 small clove garlic
Salt & Pepper
3 TB fresh lime juice
3 TB fresh orange juice
2 tsp finely chopped shallot
1 TB honey; more to taste
¾ tsp cumin seeds, toasted and finely ground
¼ cup extra virgin olive oil

To Assemble
2 large firm-ripe tomatoes, cored, seeded and cut into ¼ inch dice (1 ¾ cup)
1 small jicama, peeled and cut into ¼ inch dice (2 cups)
2 large firm-ripe avocados, peeled, pitted and cut into ¼ inch dice (about 2 ½ cups)
¼ cup coarsely chopped fresh cilantro

Roast the peppers and corn
Position a rack in the center of the oven and heat the oven to 425. Line a heavy duty rimmed baking sheet with foil. Cut the peppers in half lengthwise and remove the stem, seed core and ribs. Put the pepper halves on the baking sheet cut side down. Hust the corn and put the ears on the baking sheet. Drizzle the oil over the peppers and corn and rub it around to coat the pepper skins and corn kernels evenly. Sprinkle the corn with salt and pepper. Roast in the oven until the peppers are soft and slightly shriveled and browned and the corn kernels are slightly browned in a few spots, about 20 minutes (rotate the corn occasionally as it roasts.)

When the vegetables are done, let them rest until cool enough to handle. Scrape away the pepper skin and cut the flesh into ½ inch dice. Cut the corn kernels from the cob. You should have about 1 ½ cups kernels.

Make the vinaigrette
Mince and mash the garlic to a paste with ¼ tsp kosher salt. In a medium bowl, whisk the garlic paste with the lime & orange juice, shallot, honey and toasted ground cumin. Slowly add the oil in a thin stream, whisking until well blended. Season to taste with black pepper and more salt and honey, if you like.

Assemble the salad
Artfully arrange the corn, tomatoes, peppers, jicama and avocado in stripes or piles on a small platter or other wide, shallow serving dish. Sprinkle with chopped cilantro. Serve the vinaigrette in a pitcher. Encourage guests to spoon elements of the salad onto their plates and drizzle on some of the vinaigrette. Or drizzle the vinaigrette over the salad platter just before serving.

This is the salad with the dressing. It looks like it's drowning in dressing...but what happened is this: I prepped everything at home, packed it up and then we went to picnic. In that time, the veg let got of a lot of it's moisture. So when I spooned the veg onto the plate, I tried to drain as much liquid as I could. It appeared to work-see above photo. Well, as it sat, more and more liquid accumulated. If you make this, I'd recommend allowing the tomatoes and peppers to drain before plating...just to be safe.

FYI: This was a great salad. We highly recommend it. Particularly the jicama!!! Wow was it good. The original recipe did call for one can of black beans....not for me, thanks! So if you want to add more to the platter, that's a great option for you.

Thursday, May 25, 2006

Let me entertain you!

Hello everyone!

I’ve had several requests to restart a little something I did way back at the beginning of this blog. It's time for another Cooking Without Borders special event. For all our new gal pals, this is an opportunity to cook the same meal together on the same night (or within a few days if that night doesn't work for you) and then we all come back together and post comments on what we liked or disliked, etc.

I've selected June 1 to be the big night this time around.

This event will have a very simple, but super satisfying dinner: Chicken Coconut Curry.

Part of the game plan for the Cooking Without Borders event is that I give a shopping list to get us started, some of these thing you might already have in your pantry:

1 lb Red Skinned Potatoes-I like to get ones that are about the size of golf balls
1-1 ½ lbs boneless skinless chicken breasts
Curry Powder: pick up your favorite, or if you haven't bought Curry Powder before, I generally use the McCormick Gourmet Madras Curry
1 small head of garlic
Red pepper flakes

1 can 14 oz. can of coconut milk, unsweetened
Tomato Paste, just a small can or if you can find it in a tube, that's perfect for small amounts like this
Green Beans, I prefer fresh, but frozen actually work well, but not canned!
Salt

Optional: Pita or flatbread, great for slopping up some of the sauce.

I hope you will join us! And I particularly think this is a great recipe for beginners!!! If you think you can't cook, this is a great recipe for you!!!!

See you back here on the June 1.

FYI: I started this because way back when, many of the readers of this blog were located outside of the Washington DC area and as much as I wanted to cook and invite them over for dinner, logistically that didn't quite work. Terri in WI, did give me the idea...cook together, eat together and maybe even watch a movie together...but from different locations!

Monday, May 22, 2006

Five Spice + One Spice

I stayed late at work and had plans to head to the Giant on my way home. But then I decided that I didn't have enough time to do all I wanted, so it was going to be something quick!

I found four small, thin cut, boneless pork chops. I grabbed some shallots and headed to the check-out. With less than $5.00, I was on my way.

Ladies and Germs, I give you tonight's experiment:

Chinese Five Spice pork chops with Sherry Shallot Sauce
Serves 2

4 thin cut, boneless pork chops; all fat cut off
2 tsp Chinese Five Spice (what's this?)
1/8 tsp Cayenne Pepper
Salt/Pepper
1 TB Olive Oil
2 Medium Shallots, sliced thinly
2 TB Dry Sherry
1 TB Cider Vinegar
1/2 cup broth (Chicken or Vegg)

Combine the Five Spice, Cayenne Pepper, A pinch of salt and about two or three grinds the black pepper. Sprinkle this on both sides of your pork chops. Heat olive oil in medium pan over high heat. When hot, add your pork chops. Saute on boths sides for about two minutes each.

When done, remove to a warm plate. Add a small frizzle of olive oil if the pan is dry. Toss in the shallots and saute until tender. Carefully add the sherry. Stir up all the brown bits on the bottom of the pan. When the sherry has reduced, nearly completely, add the vinegar and the broth. Simmer until reduced by half. Spoon over the plated pork chops!

The chops doing their thing in the pan.
The Five Spice gave them this great color and amazing aroma.

I was lazy, so I served with couscous, which actually worked ok.

Another photo for fun.


I really liked this and plan to try it again. The Five Spice flavors really punch their way to the top of the flavor profile. The sauted shallots and sherry sauce help tame the flavors with a slight sweetness and pungency. The sweetness is an earthy sweetness from the cinnamon and star anise in the five spice, plus the reduced sherry. The hint of tartness is thanks to the vinegar!

Sunday, May 21, 2006

Needs some work

It has been awhile since I've given some love to Ray Ray and since I wasn't totally in the mood to cook tonight, it seem appropriate to hook us up with some dinner that only took 30 mintues.

I checked out what I had bookmarked in Rachel's book: 365: No Repeats and found Southwestern Pasta Bake.

Southwestern Pasta Bake
4 Servings

Salt
1 pound penne or cavatappi
2 TB vegetable oil
1 lb boneless skinless chicken breasts, cut into bite size pieces
1 TB ground cumin
1 TB ground coriander
2 TB chili powder
1 large onion, diced
3 garlic cloves, minced
1 jalapeno, diced fine
2 TB butter
2 TB flour
2 cups milk
3/4 cup shredded cheddar cheese
1/4 cup cilantro, chopped
1/2 cup parsley, chopped

Preheat the broiler of your oven.

Bring a large pot of water to a boil. Salt the boiling water and cook the pasta until slightly undercooked--a little chewy at center.

While the water is coming up to a boil, preheat a large skillet over medium high heat with the vegetable oil. Season the chicken with cumin, coriander, chili powder, salt & pepper. Add the chicken to the hot skillet and cook until lightly browned, about 4-5 minutes. Add the onions, garlic and jalapeno and continue to cook for 5 minutes. While the chicken is cooking with the onions, make the cheese sauce.

In a medium sauce pot, melt the butter and add the flour. Cook for 1 to 2 minutes over moderate heat, then whisk in the milk. When the milk comes to a bubble, stir in the cheese, cilantro and parsley with a wooden spoon. Season with salt and pepper and remove the cheese sauce from the heat.

Once the pasta is cooked, drain it and add it back into the large pot, add the chicken mixture and the cheese sauce, stir to combine. Transfer to a baking dish and place under the broiler to lightly brown.


NOTES:
*Ok, first off, this was not for four people. This was at least six, maybe eight! Whew.
*Second, it was alright, not great, not bad, just alright....while I was making it, I thought it was going to have a lot of huge flavors, but when all was said and done, it kind of plain.
*I covered the top with some bread crumbs to add a touch more texture, it was ok. If I do that again, I will would mix 1/2 cup of bread crumbs with some melted butter, little salt and pepper. Then put on the top of dish.
*Rachel's recipe called for 3/4 cup of cheese, I'd do at least one and maybe 1 1/2 cups next time.
*Outside of those suggestions, I'm not sure what this might need to take it from OK to good or great...? Suggestions???


I anticipated being lazy, so I used a leftover tin baking dish from Thanksgiving!
If you do make it, the recipe doesn't specify which size
baking dish; you'll want a 13x9 dish.


If I figure something out for improving this dish, it would be great for a potluck.

Wednesday, May 17, 2006

Sconey Goodness

Tonight before LOST, I made Ginger Scones. I have a full day staff retreat tomorrow for work, so I wanted to bring something nice to share with my new co-workers.


These are really simple and very tasty. You can see the chunks of crystallized ginger in the scones.
They are really easy and really tasty!!

The Good Book

About two weeks ago, I finished reading this:

I loved it! LOVED IT! Very inspiring and sweet and lovely. I highly recommend it. As the book is really about Julia's formative foodie years in France and the result of that, her book MASTERING THE ART OF FRENCH COOKING....I had to buy it!

This arrived today:

It's beautiful! An absolute classic, even in it's appearance! Can't wait to try something from it. I was giggling earlier, the first recipe I flipped to was Duck! I've never cooked duck, but have always wanted to. This might be a sign....OH MY...that is a total lie....I cooked a full duck once for Thanksgiving....it wasn't good, that's why I say I've not done duck...but maybe now.

Tuesday, May 16, 2006

Red Chicken Curry

Each Wednesday is the food day in the Washington Post. Last week they had a brand comparison on Garam Masala, a dry spice mixture. Paired with the comparison was a recipe that I thought sounded really nice. So tonight, I made it. Pretty Tastee.

Parsee Red Chicken Curry
4 to 6 servings
There's only a small amount of garam masala in this curry dish, and, as is customary, it is not added until just before serving. But many of the spices that constitute garam masala are included in a paste that infuses the chicken with its pungent flavor. For convenience, we've substituted prepared coconut milk for grated, soaked and strained coconut.

We're giving a wide range of chili peppers so you can achieve a sweet-heat balance you're comfortable with. If you can stand the heat, use all 10 chili peppers and don't discard the seeds from some of them. Too much heat? Dilute the sauce with water. Serve with basmati rice. Adapted from "50 Great Curries of India," by Camellia Panjabi, a 1996 book that has just been released in paperback by Kyle Books.

5 to 10 red chili peppers, seeded and coarsely chopped
1/2 teaspoon cumin seeds
1 teaspoon coriander seeds
1 teaspoon sesame seeds
3 whole cloves
6 black peppercorns
1-inch cinnamon stick, broken into pieces (may substitute 1/4 teaspoon ground cinnamon)
3 cardamom pods
3/4 -by- 1/2 -inch piece ginger root, peeled with a spoon and coarsely chopped
4 large cloves garlic, coarsely chopped
3/4 cup onion, coarsely chopped
1/3 cup vegetable oil
6 skinless, bone-in chicken thighs (about 1 3/4 pounds)
2 medium tomatoes, seeded and finely chopped
Salt
One 13.5-ounce can unsweetened coconut milk
1 teaspoon cider vinegar
1/2 teaspoon garam masala

Place the chili peppers, cumin, coriander, sesame seeds, cloves, peppercorns, cinnamon stick, cardamom, ginger, garlic and onions in a food processor. Pulse, scraping down the sides as necessary, to form a paste (don't worry if it isn't smooth), adding 1 to 2 tablespoons
water if necessary. Set aside.

Heat the oil in a medium pot over medium to medium-high heat. Add the spice paste and cook, stirring, for about 5 minutes. Add the chicken and cook for 5 minutes, turning once, until brown on both sides. Add the tomatoes and salt to taste and cook for 5 minutes. Add the coconut milk and reduce the heat to medium-low so that bubbles just break the surface. Cook, stirring occasionally, for 10 to 15 minutes or until the chicken is cooked through (an instant-read thermometer inserted into a piece of chicken should register 165 degrees).

Add the vinegar and garam masala. Taste and adjust seasonings. Serve immediately.

The finished dish. It could look better.

This is the onion/spice/ginger/garlic mixture. It had an incredible aroma!

NOTES:
I had 1/2 a pound of boneless skinless chicken breasts, so that's what I used. The rest of the recipe I followed pretty much as is and thought it was very nice. I didn't grind up the cinnamon stick or the cloves in the food processor, but I did add them into the mix prior to cooking. I was apprehensive about the cinnamon stick and cloves grinding properly in the food processor and not having small hard bites swimming in the sauce. Blech! Oh, one other thing that was different, I used on can of diced tomatoes, drained. I did give the tomatoes a whirl in the food processor, it was already dirty from making the paste, so I thought it would be an ok thing to try. I don't think it was a problem. Oh, remembered another note, I had my pan on the stove over the flame, with the oil in it...but it got too hot, so I poured out the oil, leaving just a thin film of oil...it was enough, so don't use 1/3 cup that is called for in the recipe.

The final note...I used all 10 of the peppers, and I didn't seed them! Wooeeey! This was a little HOT! But not in a bad way. But it does need something to cool it down, I'd really suggest a yogurt sauce. We didn't have that so it was a little dollop of Daisy.

Served with jasmine rice.


More from the Washington Post:

What makes one garam masala different from another? Freshness and the right flavor balance. The literal translation for the Indian spice -- which typically includes ground cinnamon, clove, coriander, cumin, cardamom and fennel -- is "warm spice blend." Garam masala is most often sprinkled lightly over a finished dish such as curry.

Garam Masala Test:

HEAVY ON CORIANDER
McCormick, 1.7 ounces, $4.49.
This was bulked up with coriander, a less expensive spice than the others. It lacked a
strong aroma or flavor.

MILD
The Spice Hunter, 1.8 ounces, $6.16.
Still quite aromatic with a lot of cumin.

BEST OVERALL (This is the one that I used!)
Whole Foods, 1.56 ounces, $4.79.
Redolent with cinnamon, cloves and cardamom; had the most traditional flavor.

NOT THE USUAL
Dean & Deluca, 1.5 ounces, $4.25.
The yellow color indicated the presence of curry powder and turmeric -- flavors not usually found in garam masala.

DARK
Nirmala's Kitchen Guyanese garam masala, 1.6 ounces, $6.95.
The spices were dark and over-roasted, producing a bitter, pungent flavor.

Sunday, May 14, 2006

Asian Chicken Salad

I really enjoy the food blog, Simply Recipes. The other day I had an email alerting me to a new post from Elise, so I headed over to see what was up. Seems that Elise and the girls had a night away and one of the friends made Chinese Chicken Salad. This is my take on her salad she presents. I've changed just a few little things....and the name of the dish, because of a funny Margaret Chow story. Perhaps J-lo will pipe in to tell it! Made me giggle the whole time I was making this dinner.

Asian Chicken Salad
Serves 2 as large entree salads, or 4 small side salads

1/2 lb. white chicken meat, cooked and shredded
1/4 cup soy sauce
1 tsp sherry
1 TB sugar

Vegetable oil
2 oz. bean threads (a small handful) (You could very easily substitute Chow Mein noodles)


The Bean Threads after they were fried in the vegetable oil, keep reading for more!


1 head of romaine, shredded/chopped
2 carrots, shredded
2 TB chopped toasted almonds
1 TB toasted sesame seeds

Sauce:

1 TB sugar
1 tsp salt
1/2 tsp ground pepper
2 TB vegetable oil
1 TB dark sesame oil
3 TB rice wine vinegar

1. Using two forks, shred the cooked chicken (if you don't have any already cooked, poach chicken pieces in simmering water until no longer pink inside). Mix soy sauce, sherry and sugar in a bowl and add the chicken. Let soak for 10 minutes. Remove chicken and pat dry with paper towels. Fry the shredded chicken in a little cooking oil on medium high heat to make it a little crispy and to bake in the seasoning. Set aside.

2. Put 3/4 inch of vegetable oil into a small saucepan. Heat on high heat until when you flick a drop or two of water into the oil it sizzles. Take one bunch of the dried bean threads and gently break them up a bit. Test the oil by putting one bean thread into the oil. If the oil is hot enough, the bean thread will almost immediately sizzle and puff up. That's when you know the oil is hot enough. Working with a few bean threads at a time, put them in the hot oil. As soon as they puff up, remove them carefully with tongs and place them on a paper towel to cool. The paper towel removes excess oil. Set aside.

3. Toast your chopped almonds, or chop your toasted almonds; toast your sesame seeds. (Heat a thin skillet to medium high heat, add the seeds - or nuts, don't do them both together - stir frequently until they begin to brown, remove from heat, they will continue to cook. Let cool to room temp.)

4. Mix all of the sauce ingredients together, in the order listed. Just before serving the salad, mix all of the salad ingredients together - lettuce, chicken, bean threads, carrots, almonds, sesame seeds, and sauce.


NOTES:
The original recipe called for shredded green onions. I'm not really fond of raw green onions, so I skipped them. I did add shredded carrot, I liked having the carrot in there. And it added just a touch more veg. The sauce/dressing; I only used 2 TB of oil, the recipe called for 3. The recipe called for just 'vinegar' for the sauce. I thought it would be good to do rice wine vinegar, I'm sure other vinegar would be good as well. One final note, I think I would use low sodium soy sauce to soak the chicken in. I loved the chicken as it was, but maybe a touch less salt would make it superb!

I loved this salad...my head looked like a hoover vaccum, I just sucked this salad up! Make it!!!


Close up of the yummy Asian Chicken Salad

Another photo for prosperity

Friday, May 12, 2006

A quick stir fry


The other night we experimented a bit for dinner, with good results…some work still needs to happen to make it perfect, but in the meantime it was worth sharing.

I had probably ½ a pound of pork tenderloin leftover from the Peppercorn Medallion dinner and wasn’t really sure what to do with it. There wasn’t much in the fridge in terms of things to mix in with the pork to make a meal, but I did have some onions and some carrots, I figured a stir fry would be good!

Pork Stir Fry

I thinly sliced the chunks of pork, did a large dice on the onions and ran the carrots over the mini mandolin to get thin carrot rounds. I also minced some garlic and ginger.

For a sauce, I took some hoisin sauce, soy sauce, wee bit of rice wine vinegar and fish sauce and a quick splash of water. Whisked that together.

With a touch of vegetable oil in the pan, I tossed in the onion and sauted until it was all just soft and slightly browned, then the garlic and ginger went in for about 30 seconds until fragrant (and one tsp of red pepper flakes). I scootched this to the side and slide in the pork bits. Once those were partially cooked through I added the carrots and tossed to coat with little oil and let all this cook for about two minutes. I then added the sauce and stirred to coat. I added a touch more sauce than needed, so I let it simmer for about two or three minutes to slightly thicken.

Then we served with some jasmine rice. It was good. I think there was too much hoisin? That’s ok. We cleaned our plates!


So Fresh & Hot...try getting this delivered to your house!


And PS:

Joyous came over for a cooking lesson and an episode of LOST! We made the fresh fettucine with chicken, roasted peppers and pesto! It was amazing. Please consider making it and when you do, make your own pesto!

Tuesday, May 09, 2006

HAPPY BIRTHDAY TO ME

Today is the first birthday
of
EAT WITH ME


YIPPEE!!!!


I started this thing one year ago today.

One year has brought over 260 postings, nearly 900 comments and most importantly over 140 recipes!!!! (& probably 20 pounds!)

Witht that, I thank you, gentle readers, for your support and encouragement over the past 365 days! Here's to another!

PS: I know the photos have been a welcome addition to this website, but what would you like to see more of? Also, what has been your favorite thing about the blog? Favorite recipe?

Sunday, May 07, 2006

Saucy

So, I mentioned earlier my love affair with the W&S Collection cookbooks. Well I thought it would be nice to give you a taste from the SAUCE book.

Seared Pork Medallions with Three Peppercorn Sauce

Black, white and green peppercorns all come the same plant, Piper nigrum. Black peppercorns are the unripe berries of the plant; they are fermented and sundried, which turns their skins dark. White peppercorns are ripe, as they remain on the plant longer. Once harvested, they are soaked and their skin removed to reveal white seeds. They are milder than black peppercorns. Fresh tasting green peppercorns are picked unripe and then preserved by drying or bottling in brine.
Tres Peppercorns

8 Pork Medallions, about 3 oz each (medallions are small, boneless cuts from the pork tenderloin)
1 TB canola or Olive Oil
1 TB coarsely cracked black peppercorns
1 1/2 tsp coarsely cracked white peppercorns
Salt
1 TB Butter
1 Large shallot, minced
2 TB green peppercorns, drained if packed in brine
3 TB cognac or other brandy
1/2 cup heavy cream
1 cup beef stock, reduced to 1/4 cup

Pat the pork medallions dry with paper towel. Using a meat pounder, lightly pound them to an even thickness of about 1 1/4 inches.s Rub with the oil and let stand for 15 minutes. On a plate combine the black and white peppercorns. Push the medallions into the peppercorns, pressing firmly so they adhere.

Set a large frying pan over medium-high heat. Sprinkle one side of the medallions with a tiny pinch of salt. When the pan is very hot, place the medallions, salted side down, in the pan (do not crowd). Cooking, without moving or pressing down on them, until lightly browned on the bottom, about 2 1/2 minutes. Season the tops of each medallion with a tiny pinch of salt, turn them over and cook without moving them, for 1 minute. Reduce the heat to very low and cook until just firm to the touch, about 1 1/2 minutes longer. Tranfer to a warm plate.

Sauce is simmering away.

Wipe out the pan and return it to medium heat. Melt the butter, add the shallot, and saute until slightly soft, about 2 minutes. Add the green peppercorns and cook, stirring for 1 minute. Add any accumulated juices from teh medallions to the pan, add the Cognac and 1/2 tsp salt, and raise the heat to medium-high. Shake the pan gently for 1 minute, then add the cream and reduced beef stock. Swirl to combine and simmer for one minute longer. Season to taste with salt.

Pour sauce over the medallions and serve at once.

Voila!

Notes:
1. Broth: I had one can of beef broth. I had to reduce it, but that probably wouldn't be that great. So I put the broth in a small pan, added a chunk of onion, some rosemary and some carrots...to had some extra flavor and help erase the metallic taste of the canned beef broth. (Generally speaking the canned chicken broth doesn't have the same metallic taste, manufacturers haven't been able to fix that in the beef broth.)
2. Peppercorns: The cracked peppercorns wouldn't have been enough, in terms of quantity to dip and press the pork into, for coating...so I sprinkled them one, making sure they were evenly coated.
3. Wiping the pan out: Sure, it helps, you will still have some nice carmelized flavors left in the pan...just wipe the crumbs, don't wash or rinse.
4. As I was using the canned broth, I didn't season the pork with salt. It was fine! Enough salt in the final sauce from the broth to season everything.
5. Final: This dish was great! Loved it. But the pepper is very obviously up front in terms of flavor. It's spicy, almost hot, but not really. The cream was good in cutting some of that a little bit. With the peppercorn crust and the green peppercorns in the sauce, there was a lovely contrast in texture from the smooth buttery pork medallions and the crunchy peppercorns.

As you can see, we served with carrots. If I were to do a starch, we think potatoes would be best. Maybe roasted or mashed! Delish!


Turkey Meatballs

Turkey Meatballs with Pine Nuts and Golden Raisins in Sugo

Earlier this week I decided I had to make this great recipe from Lidia Matticchio Bastianich. I caught her show where she made the meatballs with sugo (gravy).

The meatballs were amazing!!! Awesome!!!

The caveat…this should have been a weekend meal, not a Monday night meal! They take some time to do, not five hours or anything like that…but at least two hours, of some really serious kitchen time.

Disclaimer: This is my adapted recipe…I didn’t write anything down as I prepared this. So, some quantities may not be exact.

You need to start with the Sugo. As Lidia tells us:

Sugo, or gravy, is a long-cooking sauce that has a big component of meat in it, which releases its flavors as it cooks and transforms the sauce into a more complex and flavorful gravy.

The base for a good sugo is a soffrito—that essential Italian technique of cooking vegetables and aromatics in fat or olive oil slowly over low heat. Italian cuisine uses a soffrito as the start for many dishes—soups, braised meats and pasta sauces. For this sugo the soffrito is made of onions, garlic, carrots, celery and shallots. It is the first thing that goes in the pot with the olive oil.

The sugo can be cooked to the halfway point (which it reaches after about 30 minutes of cooking) in advance. Then, when you are ready with the meatballs, add them to the unfinished sugo and continue to cook together until done. You can also make the meatballs in advance, freeze them, and when you are ready to proceed with the final cooking in the sauce.

The main reason that this is adapted from Lidia’s recipe has to do with quantity. I don’t have room to store huge amounts of frozen sauce…so I had to cut the recipe in thirds.

For the Soffrito:
2 TB Olive Oil
1 Medium onion, run through the food processor until fine, like a paste almost.
1 Shallot, same as the onion
2 Garlic cloves, same as the onion
1 Carrot, same as the onion
1 Celery stalk, same as the onion.
2 Bay leaves
¼ cup tomato paste

Run the onion and shallot through the food processor. Set aside. Run the carrot and celery through the food processor. The garlic can be pushed through a press.

In a large skillet heat the olive oil over high heat. Add the onion/shallot mixture. Stir for two minutes until the onions are sizzling. Add the garlic in a hot spot of the pan, as the aroma is released, stir into the onions so that the garlic doesn’t burn. Add the carrot/celery mixture. Stir together and cook for 4-6 minutes, until everything is starting to dry out. Lower heat to prevent burning, if necessary.

For the Sugo:
1 can (14 oz) of whole, peeled tomatoes, run through the food processor to form a thick sauce.
1 can (8 oz) tomato sauce
2 cups chicken broth
Salt/Pepper
1 Cinnamon stick
1 tsp dried thyme
Pinch or two of red pepper flakes

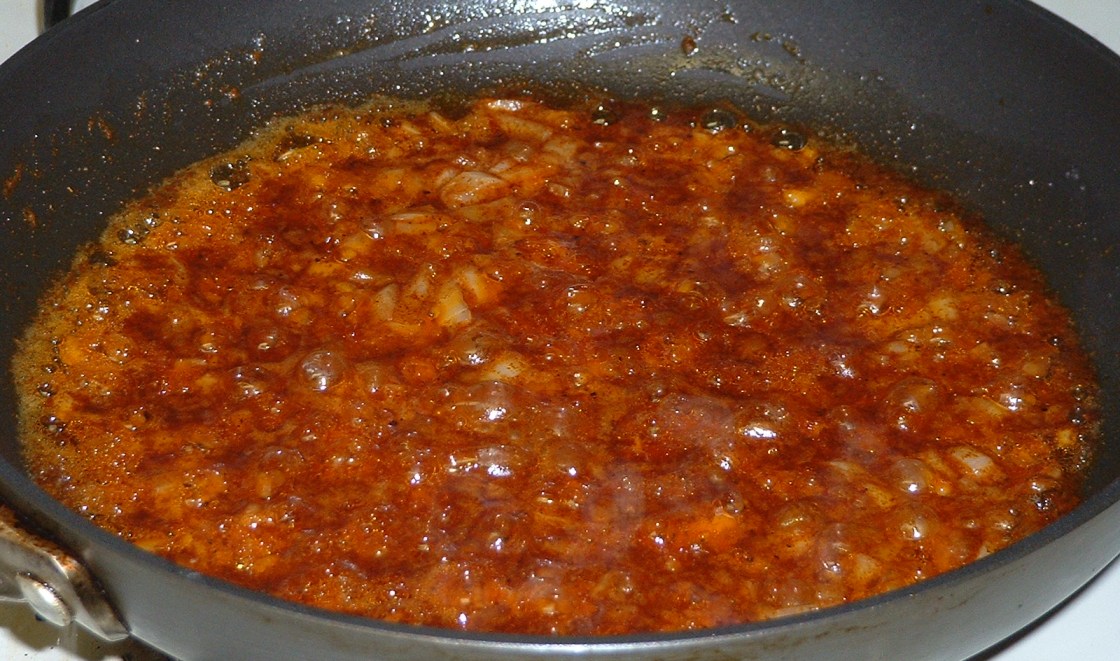
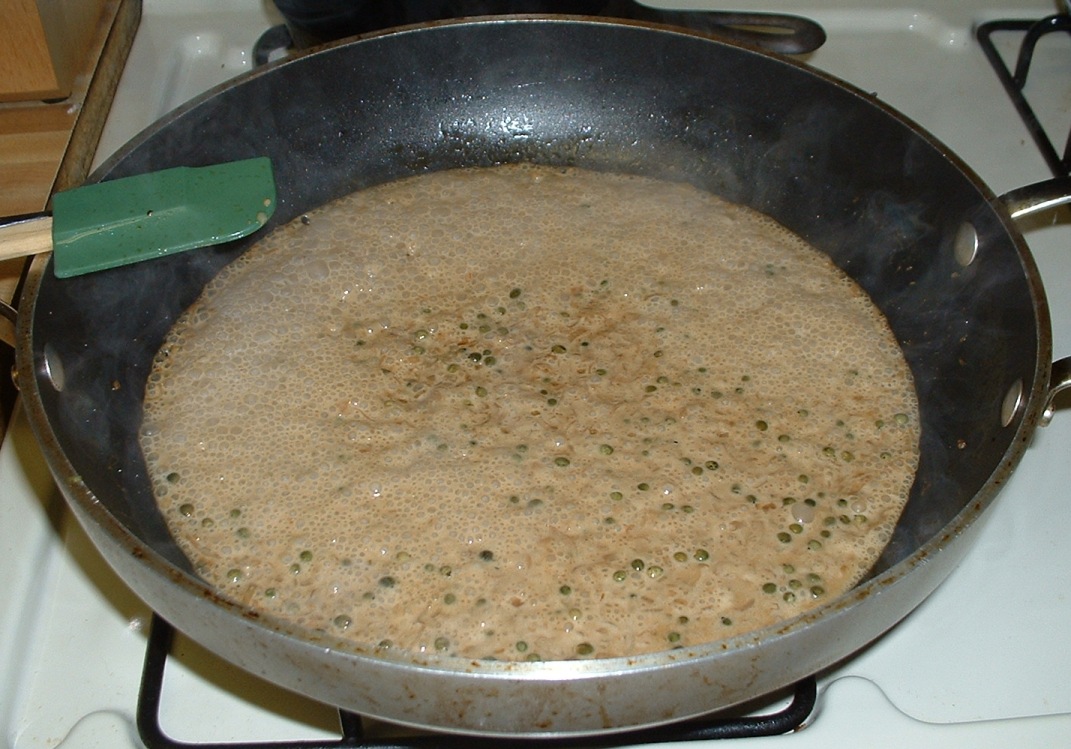
At this point in the soffrito, add the processed whole tomatoes and tomato sauce, broth, cinnamon stick, thyme, red pepper flakes. Add salt and pepper to taste.

Allow pan to simmer for an hour, stirring every 20 minutes. I left the pan covered, but slightly ajar to allow the sugo to reduce.

Now, while the sugo is cooking, we make the meatballs!

For the Turkey Meatballs:
1 lb ground turkey
1 TB olive oil
1 small onion, finely diced
½ tsp salt
1 slice of bread soaked in milk, then squeezed dry, discard milk
1 large egg
Fresh black pepper
½ cup golden raisins, soaked in water, then squeezed dry, discard water
½ cup pine nuts, toasted
Small handful flat leaf parsley, chopped finely

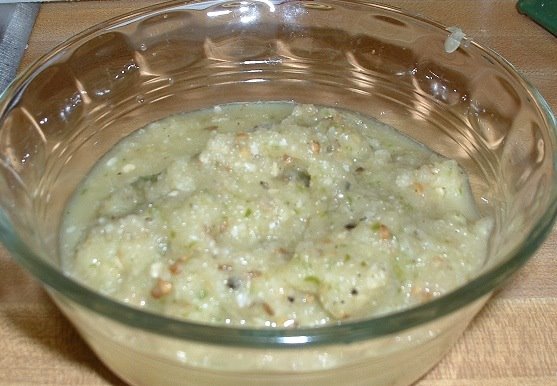
Combine all ingredients in a large bowl. Form meatballs to your preferred size. I have a small ice cream scoop that I used, it was perfect. The meatballs when done, could be cut into about three bite sized pieces.

So, form all the meatballs, be gentle, don’t handle them too much. Once formed, the meatballs need to be dusted in flour. Place a cup or two of flour in a bowl. Add a few meatballs at a time, gently toss to coat with flour, tap to remove excess flour.

Meanwhile, in a second skillet, add vegetable oil, filling about 1/3 full. Turn heat to high. When HOT, start adding your meatballs, gently, cautiously. Watch the oil level, you don’t want to overflow and cause major troubles!

Allow to cook for about two minutes on one side, then turn over and get the second side….you are only doing this to cook the outside of the meatballs. When done, remove to a paper towel lined plate. Continue until all the meatballs are cooked.

About this time, your sugo will have cooked for an hour. Now, gently lay your meatballs into the sugo. Spoon some sugo over the meatballs so they are coated. Add some water if the sugo doesn’t come to at least ½ way up the meatballs. Cover the pan and allow to slowly simmer for about 30 minutes.

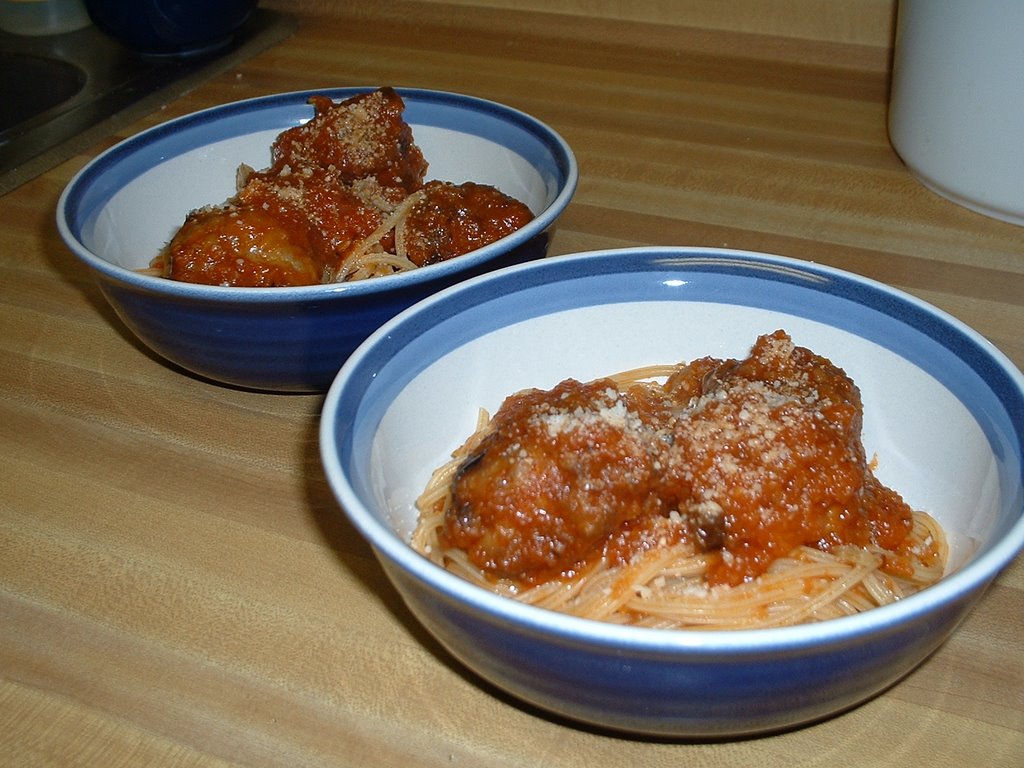
Serve with spaghetti and a sprinkle of parmesan:

As I mentioned the meatballs were amazing! The turkey and pinenuts…the raisins become these plump little things full of flavor. Really great! The sugo….was nice, but didn’t have a great depth of flavor or richness you would expect. So the recommendation….make your favorite red sauce/gravy, and put the meatballs in there to cook. This recipe gives you enough meatballs and sugo for a four people. I have about half in the freezer!

Love affair

Everyone who knows me, knows that I LOVE THE AMERICA'S TEST KITCHEN cookbooks. LOVE THEM! They are my favorite because they give you a great recipe and tell you how they got there...the mistakes they made, the slight variations they recommend, etc. Love them.

But outside of the Amercia's Test Kitchen books, I have a major love affair with the William-Sonoma Collection. Each recipe is paired with a drool worthy photo. The recipes are usually very easy. We received our first two W&S books as gifts. I think it was Pasta and _____, I can't remember the second. That was almost a year and a half ago. In fact all the books we have are actually gifts, in one way of another....I get lots of W&S gift cards for Christmas and my birthday.

As of last Sunday, we now have 15 of these books!!! I had a leftover gift card from Christmas and picked up four more!

We know have:

Asian
Bread
Chicken
Dessert
French
Ice Cream
Italian
Mexican
Pasta
Potato
Risotto
Roasting
Salad
Sauce
Soup

We also have, from their larger books: Baking, Desserts(cakes, pies, tarts) and Thanksgiving.

These are great gifts ideas...if you are looking for a small affordable gift for someone, I would recommend these...if you have a slight idea of what someone likes, you can pick an almost exact match.

I don't think I could pick one over the other in terms of what are my favorites...but the last four we bought are really great and I'm about to start trying some recipes: French, Roasting, Sauce, Soup...


...STAY TUNED


PS: Remember earlier this year I started a Cookbook Catalog on the right sidebar of this page...I stopped updating it because I was having such problems with formatting and I got really frustrated. Perhaps it will be updated and continued at some point this summer?! But I make no promises.

Saturday, May 06, 2006

Summer Lovin'

Had me a blast.

A true sign of summer is sweet corn. Sure, it's probably imported from somewhere...but it's going to be soon before the Washington Metro area is seeing fresh locally grown sweet corn. But in the meantime Whole Foods had a beautiful selection of sweet corn today. So...dinner!


Doesn't it look delicious?!?!?!

We picked up four ears of corn and four brats from the meat counter. For the corn, I put the oven at 400 and peeled off the very outer most leaves...leaving most of them and the hair intact. Then I just popped them in the oven, on the rack. You're going for 30 minutes total time, after the first 15 minutes, just rotate them over. When your corn is done, it will be perfectly hot and crunchy.

But it's not done...tonight I decided to make the corn a little special. I took 1/2 a stick of butter (4TB) and let it sit on the counter for an hour to soften. I tossed it in a small bowl and added about 1/2 tsp of cayenne pepper, 1/2 tsp of ancho chili powder, 1/2 tsp of salt and about four or five grinds of fresh black pepper. I then added the zest from one lime & juice from half of that lime. Stir it all together, really whip it to get that lime juice incorporated. Rest it in the fridge while the corn roasts and you continue with the brats.


Simmering away and the buns are toasting!

Please allow me first to say one thing. We really know bratwurst back home in Wisconsin. Seriously know bratwurst! Everyone will have their perfect way to cook them, but the general rule is....parbroil in beer...grill until crisp and golden, then back in beer with onions and butter to simmer...

I picked up four brats today while at Whole Foods...fresh and made in the store. They were good, but really...not all that compared to the basic staple of the supermarket, Johnsonville! And when you see the Johnsonville Brat, just go with the basic/original. Now, I will say that I have had some problems finding Johnsonville Brats in the DC area and have been known to buy several packs of them at once and freeze them!

As I don't have a real grill...we have a tiny little gas thing, but eh...not all that. So tonight I got my medium pan over the highest heat. I laid the sausages out and let them sear, flip them and let them sit again...you'll have both sides all lovely and golden brown at this point. With the sides gray...if you can get all sides good and brown, try, otherwise, don't worry about it....on the grill the flames usually wick up and get the sides. After both sides are crisped up from the heat, toss in one onion, sliced. Toss the onions around for a bit. They will start to pick up some of the seared bits in the pan and will start to release their juices. Make sure you have your heat over screaming heat and pour in a beer. Stand back and allow the aroma to knock your socks off! I gave it a minute and walked out of the kitchen and said..."Isn't that one of our favorite scents?" J-lo was nearly weeping! Toss one TB of butter in the pan, cover and allow to simmer for about 10 minutes. For the last few minutes, take the cover off and allow to reduce slightly.

To 'plate up', quickly toast up a bun. Place one brat on the bun and top with the onions that have soaked up the yummy beer and butter sauce. Use a condiment of your choice...mustard is a classic....I am sad to say, us German Wisconsinites also use ketchup....but I've moved away from that myself!! Now for the corn, pull back the husk, clean off any large clumps of corn hair and add a pat of the chili lime butter. Garnish with a slice of lime and go to town.


The buns that we bought were not that good...didn't hold up well.
The problem with Whole Foods, they didn't have basic sausage/hot dog buns.

Friday, May 05, 2006

First test of Guy

So the winner of The Next Food Network Star was selected a few weeks ago. Guy Fieri won...not my choice, but that's ok...I knew Reggie wasn't going to win, but was hopeful.

During the second to last episode, we, the viewers, got a look at what the contestant's shows would be like. I liked the recipe that Guy prepared and decided that I would make it tonight...a sort of Cinco de Mayo thing...but not really....really just a southwestern take on an Alfredo sauce. The Cinco de Mayo thing is really the Coronas we're drinking now!

I made some alterations to Guy's recipe before starting out...here it is:

Tequila Turkey Fettuccini
Recipe adapted from Guy Fieri

1 TB olive oil
½ red onion, cut into strips
1 minced jalapeno
4 cloves minced garlic
1 red pepper, roasted, prepped and sliced
½ to 1 LB turkey breast, cooked, sliced
2 shots tequila
4 oz heavy cream
fresh lemon juice from 1 lemon
small handful chopped cilantro leaves
½ box fettuccini pasta, cooked
¼ cup grated Parmesan
2 lime wedges, for garnish
One diced Roma tomato, for garnish
1 teaspoon freshly ground black pepper

In sauté pan with high heat, add olive oil, onions, jalapeno and sauté until translucent. Add garlic, roasted red peppers and continue to sauté for 2 minutes.

Deglaze pan with tequila, pouring around the edge of the sauté pan. Allow to reduce by half. Add the lemon juice and the sliced turkey, lightly mix ingredients, careful not to break turkey up to much.

Add cream and toss together, if it's a bit thin, allow to reduce over high heat, until slightly thickened, add pasta and toss ingredients while adding Parmesan cheese.

Nest pasta on plate, pour sauce over pasta. Sprinkle tomatoes on top and cracked pepper around the rim of the plate.


This was really tasty! We liked it. Our one recommendation would be less parmesan...strange for me to say, I know....but it was just one bit more than we really needed....a TB or two and that's all that's necessary...maybe even just sprinkle it on top, not tossed in with the sauce & pasta. Outside of that, the rest of the recipe listed above was really tasty! The Tequila was awesome and highly recommended.

Busy

I've been busy and haven't really had the time to put up a new post....By the end of the weekend, there will be two more posts...maybe a third.

But in the meantime, I wanted to give you something new. Sexy Mia shared these recipes with me recently. I wanted pass them to you! If you try them out, let us know how they go.


Creamy Artichoke Soup

Trim leaves, stems, and fuzzy chokes from 6 artichokes (save leaves for other uses). Drop artichoke hearts into a bowl of ice water mixed with 2 tablespoons lemon juice and 2 tablespoons olive oil. Bring a large pot of water to a boil and add 1 tablespoon salt. Drain hearts and add to boiling water; cook until tender. Drain. In a pan over medium-high heat, melt 3 tablespoons butter. Add 1 onion, chopped, and stir until golden. Stir in 2 tablespoons all purpose flour; cook, stirring often, 3 to 5 minutes. Add 6 cups chicken broth and the artichoke hearts; stir until mixture boils and thickens, 15-20 minutes. Whirl mixture in a blender until smooth. Return to pan and heat through. Add 3 tablespoons whipping cream and salt and pepper to taste. Ladle into bowls and garnish with chopped chervil.


Lemon Artichoke Chicken
Prep and Cook Time: about 1 hour

4 boned, skinned chicken breast halves (about 8 oz. each), rinsed, dried, and pounded to an even thickness of 1/4 to 1/2 inch
1/2 teaspoon each salt and pepper
2 tablespoons butter
1 can (14 oz.) quartered artichoke hearts, drained
2 tablespoons dry sherry
2 tablespoons grated lemon peel
2 teaspoons lemon juice
1/2 cup whipping cream
1/2 cup grated parmesan cheese

1. Preheat oven to 350°. Sprinkle chicken on both sides with salt and pepper. In a 10-inch frying pan over medium-high heat, melt the butter. Add chicken in batches and cook, turning once, until browned on both sides, about 4 minutes per side. Transfer chicken to a 9- by 13-inch baking dish and add artichoke hearts.

2. Add sherry, lemon peel, and lemon juice to remaining butter in frying pan; stir over medium heat until well blended and hot, 2 to 3 minutes. Add cream and stir. Remove from heat and pour sauce over chicken. Sprinkle with cheese.

3. Bake until sauce is bubbling and golden brown on top, 20 to 25 minutes.

Yield: Makes 4 servings