Saturday, September 30, 2006

It's been a busy week and I didn't do much cooking!

And now it's my birthday.

Happy Birthday to me!

If I don't have too much alcohol, maybe I'll have some pictures of the food we're having tonight.

Regardless....HAPPY BIRTHDAY TO ME!

Tuesday, September 26, 2006

Picky Picky

WashingtonPost.com has an interesting article on adults who are picky eaters.

As a former (really really bad case) picky eater and current (mild case) picky eater, I found this article very interested.

As a wanna-be foodie, I regularly find myself in uncomfortable situations where I have to excuse myself or explain things I don't like.

I grew up with a very mild diet of potatoes, beef, chicken, pork chops, corn and green beans (canned) and spaghetti and variations of each of these. Sure there were some other things here and there, but mostly, that was it.

Since I moved to the Washington area, I have tried to make it a habit of at least trying new things when I have the opportunity. It's hard! There are things I really just don't want to deal with. But I have also been really suprised at times. Just recently (June), we were headed to an Indian restaurant and as we were pulling into the restaurant, I leaned over and said "We might have to stop at McD's on the way home, I have a feeling I'm not going to enjoy dinner." I was 100% suprised and totally enjoyed the food. I was so pleased with myself for trying the food and totally scarfing all the food down to the point of nearly bursting!!!! Yeah Me! We're going there again this weekend!!!

But there are still things I really don't want in front of me. How about you? Are you a picky eater? What are your rules? Will you at least try it?

My list:
Mushrooms-No
Brocolli-Preferred not to have, but can get some down
Olives-I've tried, but it doesn't really work
Lamb-Out of the few times I've had it, only twice has been bearable
Most bivalves-mussels, clams, oysters. SORRY, not for me!
Seafood-There is a lot of seafood I don't like as well, but I've been trying!

Other stuff:
Cold Food...if the food was served hot, it has to be hot. I can't do hot food cold. Pizza...MUST be hot, can't eat cold left over pizza. That sort of thing. This makes for some very interesting "Leftover" situations in our house.

Wrapper

Tonight was fun. This weekend I submitted to a craving and headed to Chipotle for a burrito. That thing sat in my belly like a lead weight for nearly 1/2 the day. So when I looked in the fridge tonight I saw some things that I thought might make for an interesting Middle Eastern Wrap. The recipe that follows is pretty much estimates, I didn't write anything down.

Middle Eastern Wraps
2 chicken breasts
4 TB Baharat/Middle Eastern 7 Spice
2 TB Olive Oil
Pinch of Salt
1/2 Bell Pepper, Sliced
1/2 Medium Onion, Sliced
1/2 can diced canned tomatoes, drained
1 cup cooked rice
1/4 cup almond slivers, toasted
2 large tortillas (What we had were labelled as "Lavosh" but these were just LARGE tortillas)

Rub the chicken breasts with the baharat spice blend. Heat a medium skillet over medium high heat, add olive oil and lay the chicken breasts in the pan. Cook for about 10 minutes, flip over and cook another 10 minutes. (Time depends on the size of the chicken breasts).

Remove to a plate, allow to rest. If the pan is dry, add a small swirl of oilive oil. Toss in the onions and peppers. Allow to cook and soften slightly, about 2 minutes. Add the tomatoes, saute for about a minute. Slice the chicken.

Warm your tortillas in the microwave for a few seconds or warm in an oven.

Now time to assemble your goodies!


Lay out your large tortilla on a plate. This tortilla is about 12 inches across.

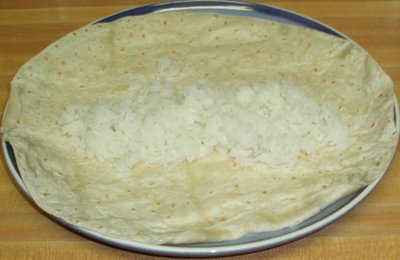
Lay out 1/2 of your rice on one tortilla.

Top the rice with about 1/2 the chicken.

Top the chicken with about 1/2 of your vegetables.

Top the veg with about 1/2 your slivered almonds.

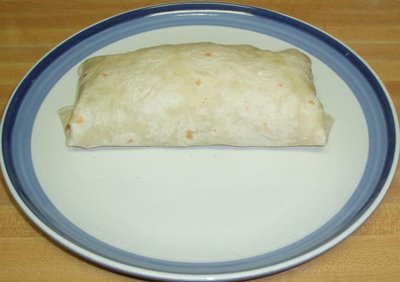
Wrap the wrap. Fold the top and start to roll. When you have rolled about 1/2 the way across the plate, fold in the sides and continue rolling. Here's a bit of a visual.


This really was tasty and I look forward to trying it again in the future. I have some ideas for the future though...maybe some saffron in the rice? How about some chickpeas or hummus? Maybe some chopped mint or parsley? How about a little yogurt sauce? Really it was satisfying and perfect as is! And I can't begin to explain how amazing the aroma coming from that baharat seasoning is. Yum!

Monday, September 25, 2006

What a night

On Sunday night, J-lo and I had a lovely with Mr. and Mrs. Chilefire, and lil' Chilefire, at their home, the Bobbel K at the Washington Marina!

What a great night. Boat! Wine! Beer! Food! Chocolates! Friends! All great!!!

The front deck of the boat.


Sunset from the back deck of the boat. To the right, off the frame, is the Washington Monument.

After a few drinks, a quick trip to the fish market and some more drinks, we started to prepare dinner! Before we arrived, Bryce made smoked duck tamales and he smoked some tomatoes for an amazing chile sauce (Pssst, Bryce...is the recipe on your site?).

We then set out to prepare the Shrimp with Red Chiles and Pine Nuts.

So simple!!!

Nutshell: Roasted Pine Nuts, Olive Oil, Cook shrimp, add chimayo chile powder, a drizzle of honey and a splash of cream. Done! Oh, and some garlic.

Adding the olive oil to the toasted pine nuts.

The shrimp tossed into the oil and pine nuts.

Money Shot! Adding the Chimayo Chile Powder. Bryce mixed up a blend of medium powder and mild powder. Considering the quantity of powder, you'd think this would be a crazy fiery hot dish...perfectly warming yes, but so flavorful and amazing!

And dinner. The Shrimp. Micro Greens with a balsamic reduction and olive oil dressing. And the Smoked Duck Tamale with Red Chile Sauce. So much food and soo delicious!!!

THANK YOU Bryce, Naomi, Fiona and the bunnies for a truely lovely evening. Looking forward to the next adventure.

Thursday, September 21, 2006

Cashhhhewww

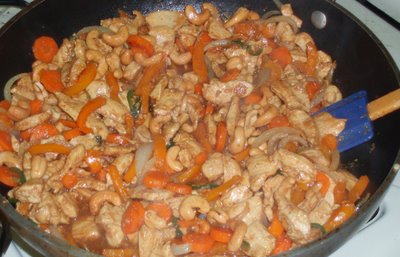
I made yummy Cashew Chicken for dinner tonight. Mmmmm! I used this simple recipe that we've talked about before on this blog. Great flavors, little prep and a quick time in the pan and soon you're filling your belly with a really tasty and pretty healthy dinner.


Normally I would have green pepper in there, but Giant had the most god awful looking green peppers I've seen in ages. Shameful!

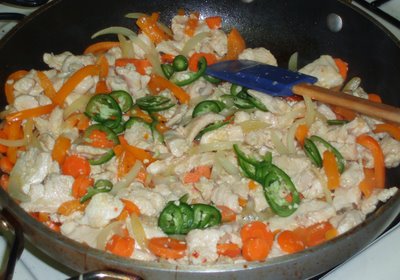
I really love the colors in this pan though...all that orange. How can you not be happy and excited for dinner with that great color!

OK, there's some green-1 whole jalapeno. I decided tonight it would have been appropriate and tasty to add some basil leaves at this point. I didn't because I'm wee bit lazy and didn't want to go to the garden to get the basil. Ha...garden!

If I am dead in a day or two, it's Giant's fault. The cashews we bought had the freshness seal/security seal, whatever it's called...opened! But what's cashew chicken without cashews? Not cashew chicken...so I added them a touch earlier than normal and allowed them cook in the hot sauce long enough to kill anything that might try to kill me! We'll see in a day or two if I'm still alive.

Enjoy!

Monday, September 18, 2006

Spice is nice

For the past three or four days I've been craving some food with a Middle Eastern flair. I just started reading the book, The Language of Baklava by Diana Abu-Jaber. The book is a memoir of Diana's life growing up with her Jordanian father and American mother and who the two worlds collide and the food influences on both lives. I'm about 100 pages in and am really enjoying the book. But it's really about food and the memories that come with it.

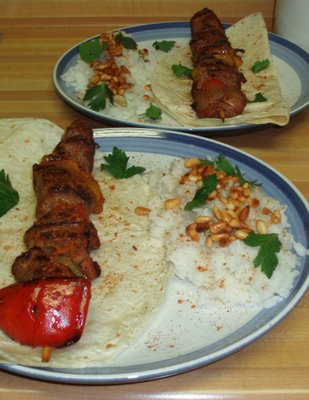
So tonight I decided to have a go at it. I've made kebabs before, never really anything worth writing home about. And tonight was no different. They came prepared from Whole Foods...all I did was fry them up on the grill pan. I served with some rice, which I loosely based this recipe on from the book. (Rice with pine nuts and some cinnamon).

What I really want to share with you all is the homemade spice blend that I made, from this website.


Baharat (sometimes known as Middle Eastern Seven Spices)
makes about 1 cup

1/4 cup whole black peppercorns
1/8 cup whole coriander seeds
1/8 cup whole cloves
1/4 cup cumin seeds
1/8 cup cinnamon bark
1/4 cup paprika
1 tsp cardamon seeds (not pods, the little seeds inside the pods)
2 whole nutmeg, grated

1) Toast the first four spices in a dry pan, over medium heat, until they become warm and fragrant.

2) Add spices into your spice grinder. Add the cinnamon and cardamon seeds. Whiz until fine.

3) Add the paprika and grated nutmeg. Whiz together. Done.

Store in a airtight container for a few months.

Tonight I sprinkled some on my kebabs and on top of the rice. When the spice mix hits anything warm, the cinnamon is the first aroma to rise up, followed by the cumin and clove. It's really an amazing scent and I can't wait to use it more and more. The kebabs were marinated from the store, so I didn't use as much as I would have liked, but I did sprinkle some on towards the end of the cooking.

Sunday, September 17, 2006

Nigella Nigella Nigella

I had been searching for some photos I had taken with the old digital camera about two/three years ago. Well, I found it last night! Wahoo.

So I'd like to share a Nigella Lawson recipe with you. Her new show starts on October 1 on the Food Network. If you've ever uttered the words "food porn" in your life, watch her show!!!! I can't wait.

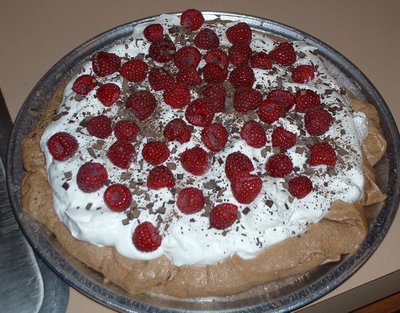
I had made the following recipe once. I don't remember if there was an actual occasion for this or if I was just being nice?! We lived on the Hill and Lord and Lady B and The Kara were joining us for dinner. When it came time for dessert, I finalized the assembly in the kitchen, took a picture and brought it out. We ate the whole thing...without serving plates! We just dove in with large spoons. DIVINE!

Chocolate Raspberry Pavlova
page 189, Forever Summer
You just cannot beat a pav in summer, and in particular this dark beauty. The crisp and chewy chocolate meringue, rich in cocoa and beaded in nuggets of chopped plain chocolate, provides a somber, almost purple-brown layer beneath the fat whiteness of the cream and matte, glowering crimson raspberries on top: it is a killer combination.


for the chocolate meringue base:
6 egg whites
1 cup granulated sugar
3 TB unsweetened cocoa powder, sifted
1 tsp balsamic or red wine vinegar
2 oz bittersweet chocolate, finely chopped

for the topping:
2 1/4 cups heavy cream
1 very full pint of raspberries
2-3 TB coarsley grated bittersweet chocolate

Preheat the oven to 350 and line a baking sheet with parchment paper.

Beat the egg whites until satiny peaks form, and then beat in the sugar a spoonful at a time until the meringue is stiff and shiny. Sprinkle over the cocoa and vinegar, and the chopped choclate. Then gently fold everything until the cocoa is thoroughly mixed in. Mound onto a baking sheet in a fat circle approximately 9 inches in diameter, smoothing the sides and top. Place in the oven, then immediately turn the temperature down to 300 and cook for one to one and a quarter hours. When it's ready it should look crisp around the edges and on the sides and be dry on top, but when you prod the center you should feel the promise of squidginess beneath your fingers. Turn off the oven and open the door slightly, and let the chocolate meringue disk cool completely.

When you are ready to serve, invert onto a big, flat-bottombed plated. Whisk the cream till thick but still soft and pile it on top of the meringue, then scatter over the raspberries. Coarsely grate the chocolate so that you get curls rather than rubble, you don't want the raspberries' luscious color and form to be obscured, and sprinkle haphazardly over the top, letter some fall, as it will, on the plate's rim.

Serves 8-10 (or not if you eat it all)

Friday, September 15, 2006

Roasted Bells

Made a pot of yummy Cream of Roasted Red Bell Pepper Soup tonight! Really yummy.

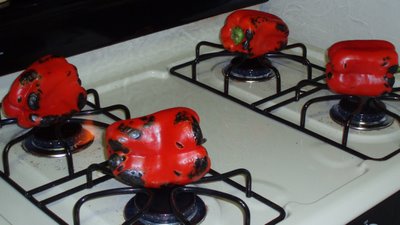
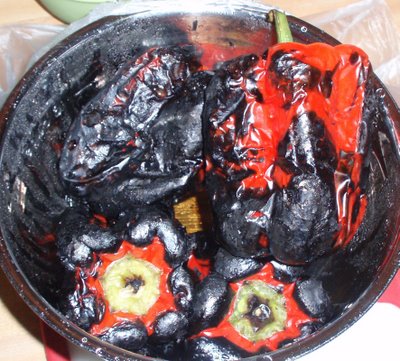
To start the soup, I needed to roast the peppers...and I do that on the top of the gas stove! Wash your peppers, pat them dry and lay them on the gas stove, right over the flames. Rotate as they char and turn black.

Here they are, nearly done. You want to make sure they are turning black, not white or gray, if they are, they are actually burning!


When the peppers are all blacked, place in a bowl and cover with plastic wrap and allow to cool. This will help the char just slip away. So, clean the char off the peppers, cut out the seed pod, and cut into large pieces for the soup.

SOUP RECIPE HERE!


I really like this soup and hope you all give it a try!
DON'T EAT YOUR SPINACH!

If you haven't caught the news today, the FDA is urging people not to eat their spinach right now. Bagged spinach.

It has been linked to e.coli outbreaks.

Thursday, September 14, 2006

Savory Tart

It's been another one of those weeks, so I apologize for the lack of posts. I thought I was having allergy issues, but it turns out I really was just sick! Mostly better now.


This is from Tuesday evening's dinner. It's a carmelized onion and tomato tart. Let me explain.


On Tuesday I had the priviledge of voting in the Maryland Primary elections! Yeah Democracy!!! My polling place is behind the grocery store at an elementary school. So being a responsible citizen and voting, I stopped in the store to get a donut! Well, they actually didn't have donuts, but I thought I'd see if there was something I could buy for dinner now, instead of stopping on the way home.

I decided on some fresh thyme, 2 medium vine-ripe tomatoes and some puff pastry. Since the puff pastry is in the freezer section and I'll want it defrosted, I'll just store it in the fridge at work.

Preheat the oven to 400.

Later that night at home, I took one large sweet onion and sliced it into strips and dropped them into a medium heat saute pan with some olive oil. Seasoned with some salt and pepper and a few branches of the thyme. For about 20 minutes, I would return every few minutes and stir, allowing the onions to sweat and carmelize, but not turn brown.

When they are done, allow to cool and remove the thyme stems.

Meanwhile, slice your tomatoes to about 1/4 inch. Remove the seeds. Lay on a rack over paper towel. Sprinkle with salt. This will draw out some extra moisture so the tomatoes don't make your tart to wet later. Allow to rest while your onions carmelize and you prepare the puff pastry.

Now, prepare the puff pastry.

A package of pepperidge farm puff pastry has two larger sheets. Remove one sheet and unfold. For this recipe, I cut one section off and returned it to the box with the remaining sheet. Cut the two remaining sections into a square. Take some of the scrapes and cut out a narrow (1/4 inch) strip of puff pastry and apply to the outside border of the square puff pastry. See the little border in the photo...that's what you want to do! When you apply the strips to the square, brush on a little water, to help them stick together.

With your box complete, you need to dock the dough! Do what to the what? Take a fork and poke holes into the inside of the puff square. This will allow the steam to escape, keeping the dough under your filling from puffing too much.

OK, you're now ready to assemble your tart.

Arrange the onions in a layer inside the square. Now top the onions with a thin layer of grated Parmigiano Reggiano. Yum! Now arrange the tomatoes inside the square. But first blot off the excess moisture. Once they are arranged sprinkle with a touch more parm and then give them a light drizzle of balsamic vinegar.

Place in the oven and bake for about 20 minutes until the parm is melted, the tomatoes are starting to roast and puff is puffed and lightly browned.

Sprinkle some thyme leaves over the top as a garnish. Slice and serve.

This was tasty and I plan to try it again. I'm sure there is something I'd change, but I don't know what...not until I try it again. But it was tasty. Now, we had this as "dinner." Well, it's not really enough to be dinner...it needs a salad or some soup.

Sunday, September 10, 2006

Pain in my Perdu

Pain Perdu is French Toast...literally "lost bread" and that means delicious. Every person I've watched make french toast has made it differently, but there is a basic recipe that all french toast starts from.

This breakfast was really rich and tasty. I've made some good french toasts before (pecan crusted once and another time stuffed with marscapone cheese...mmmm), but this one was really great and I think there is one reason; homemade brioche!!!

We had special bacon with the french toast. Mmmm, bacon. I'm pretty positive that the special bacon was something I saw Rachel Ray do on her show.

French Toast with "special bacon"

Bacon:
1/2 lb bacon
1-2 TB brown sugar
Black Pepper

French Toast:
4-6 slices of good bread (Brioche, Challah, Sourdough, etc.)
4-6 eggs
3/4 cup milk
pinch of salt
fresh grated nutmeg (I used 1/2 a nutmeg; maybe 1 tsp)
1 TB brown sugar
1-2 TB butter

Preheat oven to 375.

Start with the bacon. Layout the bacon on a parchment lined, rimmed, baking sheet. Lightly sprinkle with the brown sugar and then give a few grinds of fresh black pepper on top.

Place in the oven for approximately 20 minutes, until done to your perfection (chewy to crispy, or just in between).


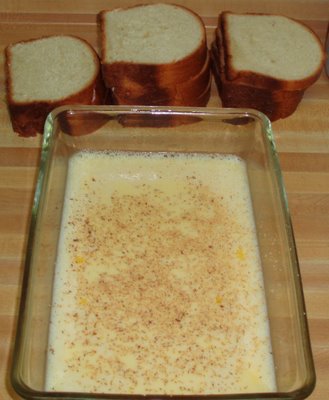
While the bacon is in the oven, start the french toast. Mix the eggs and milk in a baking dish. Add the nutmeg, brown sugar and pinch of salt.

When the bacon comes out of the oven, start the cooking process. Heat a large skillet over high heat. Add a few slices of the bread to the egg mixture. Allow the bread to soak up the custard. This amount of time can range, for thinner, fresher bread, this can just be a short time, seconds even. For bread that this thicker or more stale, it may need some extra time to soak. I had two different thicknesses of bread. The thinner bread was about 1/4 inch thick, these soaked for about 30 seconds per side. The thicker bread was nearly an inch thick and those soaked for about a minute per side.

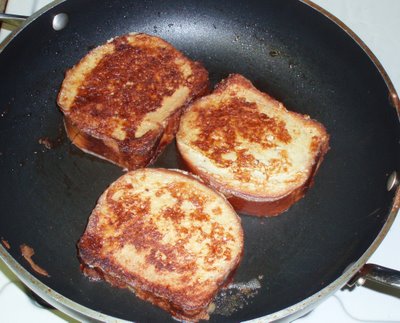
Add some butter to your hot skillet. When melted, lift your bread out of the custard, allow excess to drip off and gently lay in the skillet, I lowered the heat to medium heat. Cook for a few minutes per side until golden brown and delicious.


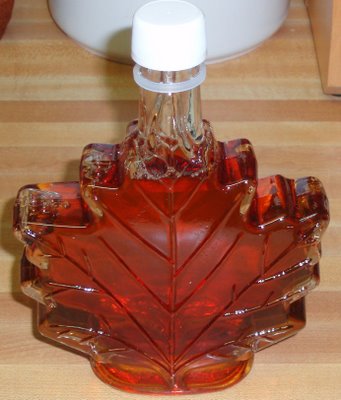
Serve with your favorite syrup or jam. Enjoy.

Saturday, September 09, 2006

Hot Potato Hot Potato

I had a message yesterday from a friend that her pal is opening a new cafe in DC and having been to the original cafe in Annapolis, I WAS THRILLED!

Potato Valley Cafe
614 E Street NW
Washington, DC

Opening Mid-late October 2006!

Around the corner from the Shakespeare Theatre Company (check out An Enemy of the People, it's pretty good) and the Verizon Center (they need to change their URL address).

A few years back, I went to the PVC in Annapolis with Ms. Becca and Lady B. The menu had about 25 different baked potato entrees. Potatoes topped with everything from salads, veg and chicken to the old school favorites of butter and sour cream. I don't remember exactly what I had, but the things I remember most was, a) the potato was cooked perfectly and b) it was topped with this amazing little onion crispy things. WOW!

The Annapolis location.

Another Blogger's comments on the new location.

See you soon at Potato Valley Cafe DC!

A Brisket, A Tasket

A few weeks ago, after we had the "smoked carrot cake incident" we headed out to a b-day party for Lord B where we dined on burgers and salads and some other goodies. One of the other dishes was this great tasting beef brisket and I insisted I had to have the recipe! I got it! THANKS S!

What a simple recipe! The recipe I received was for a 4-6 lb brisket, I had a 2 lb version, so here is my altered version:

Braised Brisket
serves 3-4
prep time: 5-10 minutes
cooking time: 3 hours

Approximately 2 lb beef brisket
Salt/Pepper
Juice from 1 lime
2 medium onions, sliced
2 tsp liquid smoke (After searching three stores, I found hickory flavor)
1/2 cup water


Heat oven to 350.

Place 1/2 the onions in the bottom of a baking pan that will fit the brisket.

Use 1/2 the lime juice and 1 tsp of the liquid smoke on each side of the brisket. Season with salt and pepper.

Lay the brisket on top of the onions, and place the remaining onions on top.

Place in the oven. Cook for one and a half hours. Remove and cover with foil and return to the oven for another hour and a half.

Remove from oven and allow to rest of 10 minutes. Slice or chop the brisket. Serve with a little drizzle of the cooking liquid and onions.

YUM!

Wednesday, September 06, 2006

Brioche

The other day I was rolling through my favorite blogs and I stopped in to see what was up at The Traveler's Lunchbox, a favorite for great writing and amazing photography. Our host was extolling the virtues of homemade brioche! I was compelled and felt up to the challenge!!!

Ladies and Germs, The Traveler's Lunchbox's fresh baked Brioche in seven steps and nearly 24 hours!
(It's a commitment and you do need a heavy duty mixer.)


Brioche with Browned Butter and Vanilla
makes 2 loaves

Browned Butter:
2 vanilla beans
1 cup (2 sticks) unsalted butter

Sponge:
2 tsp (1 packet) "rapid rise" yeast
1/2 cup whole milk, room temperature
1/2 cup bread flour

Dough:
1/2 cup sugar
1 1/4 tsp salt
4 large eggs, lightly beaten
3 cups bread flour, plus more if needed

Wash:
1 egg
1 TB heavy cream


The flour.


Step One/Hour 0 (approximate hours!)
Make the browned butter. Split the vanilla beans down the middle and scrape the seeds with the tip of a knife into a skillet. Toss the pods in too and add the butter. Turn the heat to medium. Swirling occasionally, bring the butter to a boil and keep it boiling until the solids turn chestnut brown and everything smells deeply nutty. Do not let it burn. Remove from the heat, remove the vanilla pods and pour into a heatproof bowl or container (scraping in all the vanilla seeds and browned butter particles), and refrigerate until solid, about 2 hours.
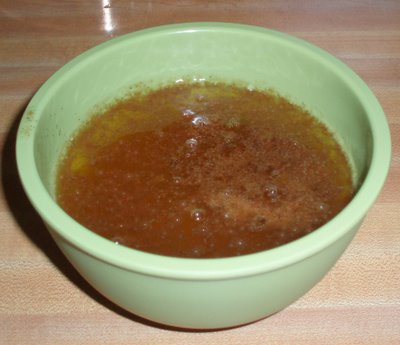
The browned butter with vanilla. This smelled so awesome!!! I wanted it on pancakes and with rolls!

Step Two/Hour 2
Make the sponge. Put the yeast, milk and flour in the bowl of your heavy duty mixer. Mix the ingredients together with a rubber spatula, mixing just until everything is blended. Cover the bowl with plastic film and set aside to rest for 30-40 minutes. During this time it should bubble up, your indication that everything is moving along properly.

Step Three/Hour 2.5
Remove the brown butter from the refrigerator.

Add the sugar, salt, eggs and remaining flour to the sponge. Set in the mixer and attach the dough hook; mix on low speed for a minute or two until the ingredients loosely come together. Increase the speed to medium and knead the dough for 15 minutes. Stopping to scrape down the hook and bowl as needed. During this mixing period, the dough should come together (clearing the sides of the bowl), wrap itself around the hook and audibly slap the sides of the bowl. If it doesn't come together after about 8 minutes, sprinkle in more flour, one tablespoon at a time (maximum 1/3 cup), until it comes together.
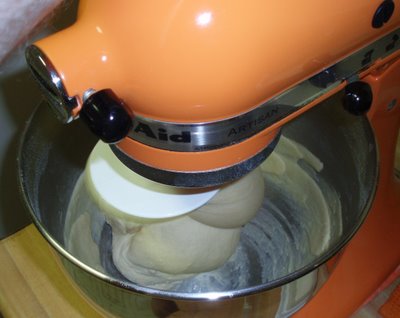
See how the dough is sticking to the dough hook? That's good!

Step Four/Hour 2.75
Incorporate the butter. First stir the butter, so it's slightly softened. After your dough has been kneading in the mixer for 15 minutes, start adding the butter, a couple of tablespoons at a time. Once the butter is all added, lay a towel over the mixer, so the bowl is covered. Turn the mixer from low to medium. The dough that you worked so hard to make smooth will fall apart. Don't panic-just carry on. It will look like a runny batter, not a elastic dough. Beat the dough for five minutes. The dough will start slapping the side of the bowl again. When you are finished, the dough will feel somewhat cool, and be shiny, slightly sticky and very elastic.

Transfer the dough to a large oiled bowl, cover tightly with plastic wrap and let it rise at room temperature until doubled in bulk, 2-2 1/2 hours.
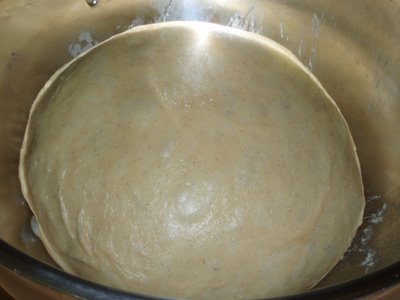

After two hours!

Step Five/Hour 5
Deflate the dough by kneading it a few times in the bowl with greased hand. Cover the bowl tightly again and put in the refrigerator overnight, or for anywhere from 6-24 hours, during which time it will continue to rise and may double in size.

The dough's been punched down.

After a long time in the chill chest.

Split into two loaves!

Step Six/Hour 20 (I left my dough for 15 hours)
To make loaves; grease two loaf pans, line with parchment paper and oil the paper as well (this will make sure the loaves remove from the pans with ease-I didn't and it was a pain). Remove the dough from the refrigerator and working quickly, divide the coald dough in half. On a greased work surface, pat each half into a square about the length of one side of your pan. Roll each half up tightly, pinching the seam together to create surface tension. Lay the dough in the pans, seam side down. Cover the pans with buttered plastic wrap and allow the dough to rise at room temperature for 2-3 hours, or until doubled in size. Preheat the oven to 375.

Dough is doubled!

Glazed with egg & cream.

Step Seven/Hour 22
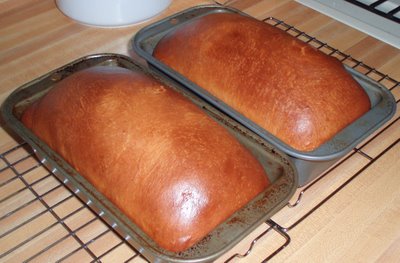
Mix the egg wash (egg and cream), lightly brush the tops of the loaves. Bake the loaves for about 30-40 minutes, until they are well-browned, firm and lofty. Cool to room temperature on a rack; consume or freeze within a day.

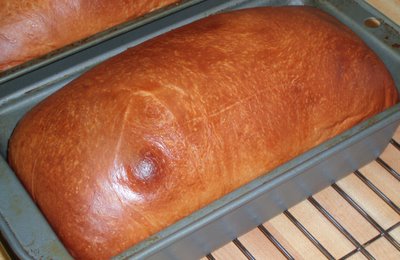
Look at those pretty little vanilla specks! When you slice the bread, use a bread knife and allow the knife to do the work, don't push down, you'll squish the bread.