Showing posts with label Dessert. Show all posts

Sunday, January 22, 2012

January Dinner Party!

Good Day everyone! The first month of 2012 is trucking towards an end...already! I mentioned just over a week ago, my goal for 2012. A dinner party each month...and a blog post about it. So here goes.

The January Dinner Party.

Planning: Planning started before Thanksgiving on this one. A friend of ours wanted to introduce us to two friends of hers. They happened to have just moved to our town and were getting settled in and our friend thought it would be nice to introduce us. I jumped, at the time, at the opportunity to host, something I do love to do. But, the problem was, Thanksgiving was in the middle, plus a trip to Italy for the spouse and I!!!! (AH-MAZE-ING!) So the soonest we'd be able to host was January. That gave me plenty of time to think about what to make, even though I didn't get myself all the time.

I like my guests to feel comfortable with the food, so I always ask if there are any major dietary restrictions. If I have vegetarians coming for dinner, I'm not going to make a huge beef roast. No major restrictions this time around, but there was a preference for chicken, which I'm supper cool with.

Menu: Having just come back from 10 days in Italy, I knew I wanted to make something with an Italian spin to it. After flipping through several of my cookbooks, I settled on a chicken saltimbocca. Traditional saltimbocca is veal. I'm not fond of veal, so this chicken variation was perfectly awesome. For side options, I went with basil risotto and roasted green beans. Dessert would be something we had in Italy and it was incredible; Crema di Mascarpone.

I would also put out a few small nibbles to get us started and I made a great focaccia. Plus plenty of wine!

The focaccia was a standard recipe I've made before, but topped with caramelized onions and rosemary. It's awesome. The dough is pretty simple to pull together and it doesn't take a full day to make.

The table set for our guests. Not much will change over the coarse of the year. This is what we have. If we have more than four people, the table needs to be opened up and the tablecloth doesn't really fit. And with one main set of plates, this is it. That being said, I like to have the table ready to go before people arrive. Have as much stuff as you can ready. When your guests arrive, you want to talk with them, not say hello and have to run away.

I mentioned small nibbles. Any small nibble for me will include some cheese, nuts and cracker. These little crackers were awesome. They had black pepper in them, but they were wafers, not crackers. Fun. Also, I love marcona almonds. Also included, but not seen, I sliced a pear to go with it all. The guests brought more cheese! One thing I've learned over the years, don't over do the nibbles. I have been known to make so many nibbles, we don't really need to eat dinner! So, only a little bit of nibble per person, just hold off the stomach rumbling while we wait for dinner.

The main plate. It was pretty darn delicious! Risotto can be found here. Don't miss read the recipe and make twice as much as you intend! SO MUCH RISOTTO. The green beans were washed and dried. Tossed with olive oil and put on a rimmed baking sheet and into a hot oven, I think 400-425. Roast until they are al dente, about 15-20 minutes. Toss them half way through. When they are done, toss with caramelized shallots for more goodness.

The chicken. Super simple. Take a boneless/skinless chicken breast. Make sure it's cleaned up of any excess fat and then kind of manipulate it into a uniform shape, with the other pieces. Season with salt & pepper. Lay 1-2 leaves of fresh sage on the chicken, then wrap with 1-2 slices of prosciutto, tucking the ends under the cutlet. I then put the cutlets back in the fridge, until I was ready to cook. The extra cool allowed them to firm up a bit.

When you are ready to cook, in a large skillet, over medium-high heat, get 2 TB of olive oil nice and hot. Quickly and lightly dust the wrapped cutlets with flour and place in the pan. Cook for about 10 minutes per side, or until cooked thru. This will depend on the thickness of the cutlets. If things start to burn, lower the heat.

When the chicken is done, remove to a clean plate and deglaze the pan with 3/4 cup of dry white wine and 1/4 cup of chicken broth, reduce by half. Season with salt, pepper and a few chopped sage leaves. Swirl in one to two TB of butter. Add any accumulated juice from the cooked chicken, back into the pan. Spoon the sauce over the chicken, when you serve it.

A note on dinner. I prepped everything in advance. 30 minutes before we were ready to eat, I started cooking the risotto, beans and chicken. Everything, miraculously, was done at the same time +/- a minute of two! It was awesome.

Enjoy dinner and your company!

Dessert! Dessert was something special! Here, you're getting the actual recipe:

Creme di Mascarpone
Serves 6
3 eggs, separated
3 TB fine white sugar* (fine texture, not classy ohh la la)
1 1/3 cups mascarpone cheese
1 tsp orange zest
2-3 TB rum
Garnishes

Beat egg yolks and sugar until pale and fluffy. Fold the mascarpone into the yolks, a little at a time, until fully combined. Stir in the orange zest and rum.

Beat egg whites until stiff. Fold into the yolk mixture. Fold whites into the yolk/cheese mixture. Chill in the refrigerator until ready to serve.

Garnish with shaved dark chocolate, fresh berries and light, crisp cookies!


*The sugar...my sugar does have a vanilla bean split and stored in it...so the sugar does have some vanilla essence. If you want, feel free to add a drop or two of vanilla extra for further awesome flavor.


There we go folks. My first proper blog posts in 10+ months. My first proper dinner party of 2012! Cin cin!
Monday, January 31, 2011

Creme Brulee!

Hey guess what? My tiny little blog that I have been operating since 2005. My tiny little blog that over the past year and a half to two years has averaged only 60-75 visitors a day. Well, my tiny little blog has surpassed 100,000 visitors, since I started tracking in 2006! Woo hoo!!! Thanks readers. A special thanks to DCBlogs for featuring my post, which in turn pushed me over 100,000!

So a few weekends ago, I had this awesome dinner party. I don't pull out all the stops that often, but this time I did. After treating people to fun nibbles to start, we sat down for a great dinner (that post is coming down the line!) Of course at this point, we were stuffed to the gills. No reason to eat anything else. But that would be foolish. So dessert is a MUST! And what a perfect dessert it was!!!

Le Cirque's Creme Brulee

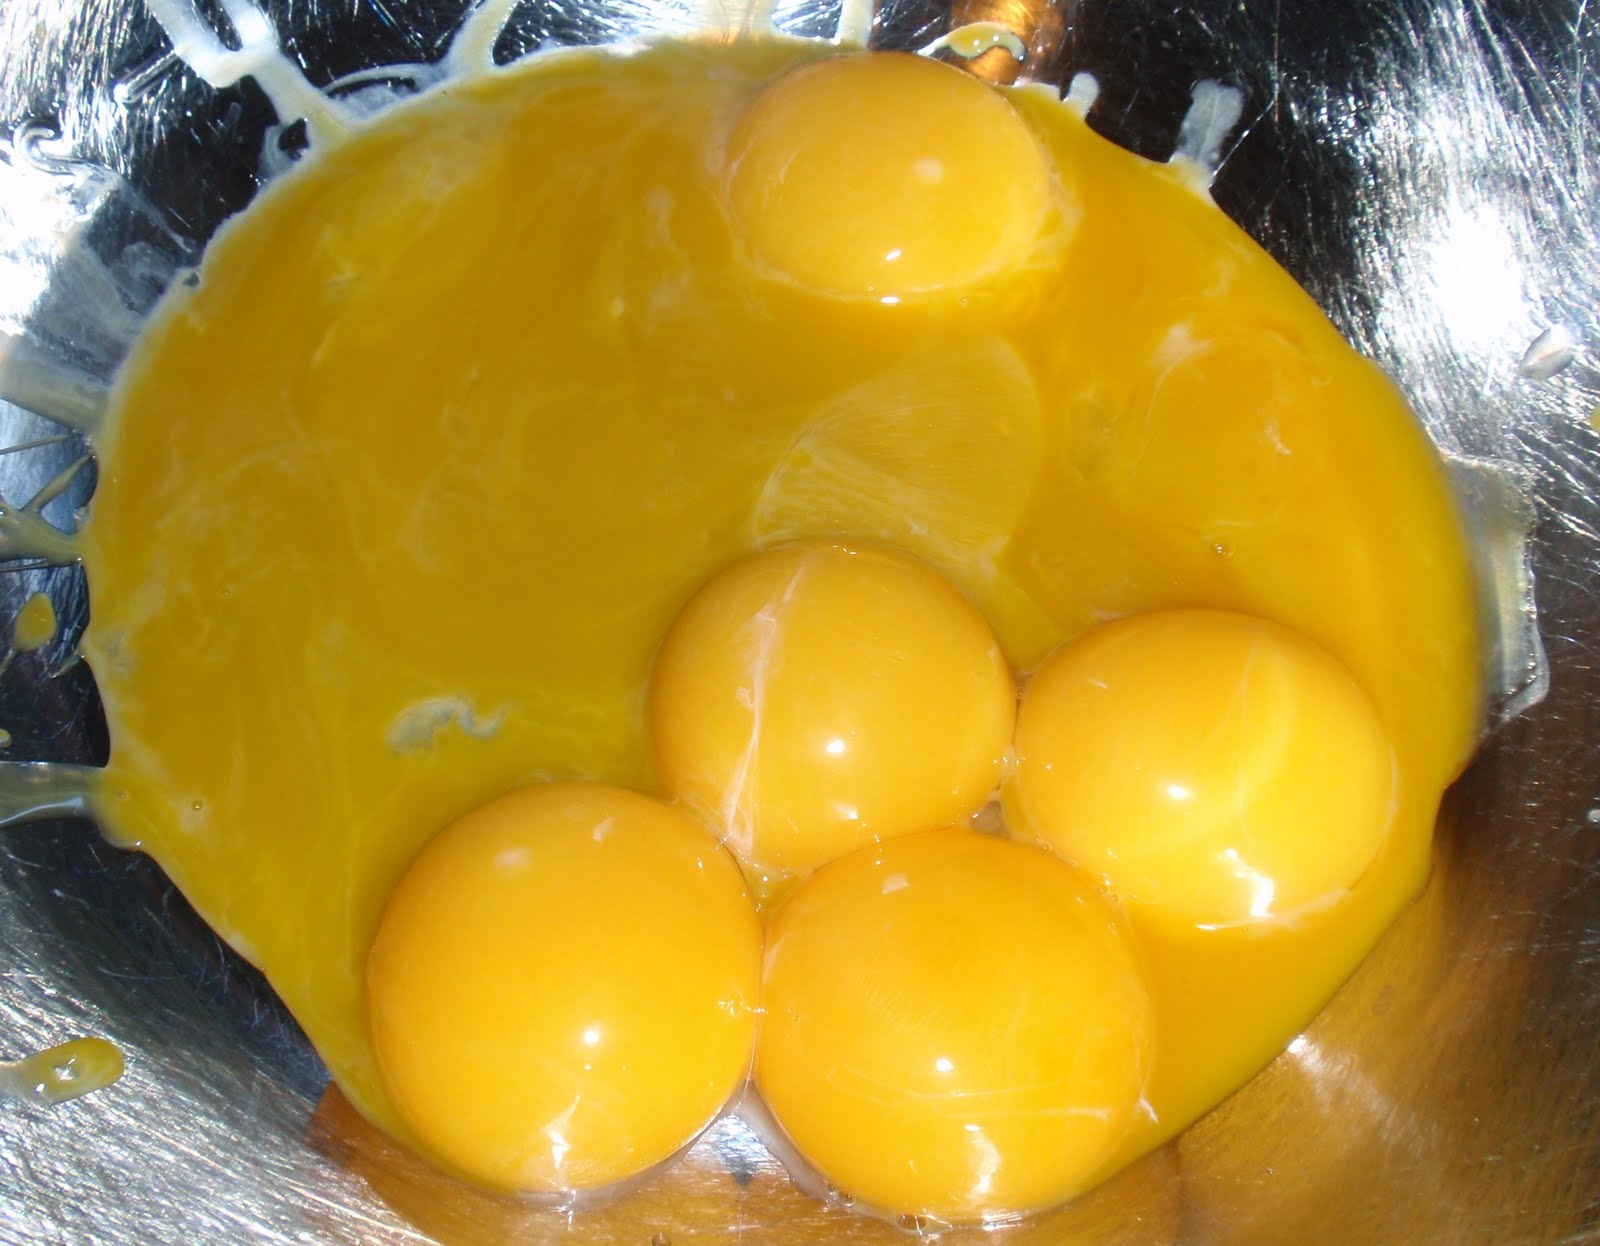
Creme Brulee starts with the best eggs you can get. Farm fresh is best! Organic and/or free range is the next best. But whatever, make sure they are fresh and the best you can get. The egg whites can be frozen and saved for a later use, perhaps a pavlova.

Mix the egg yolks with sugar. That amazing orange yolk will turn to a beautiful pale yellow.

Of course, like the eggs, get the best heavy cream you can. I wish I had easy access to a dairy. Alas, I went with an organic heavy cream from my local market. Heat the cream with vanilla bean/seeds. And if your naughty and have a good quality vanilla extract, a little extra shot will shoot your creme brulee to the moon! But don't tell anyone, that's our little secret.

Once the cream and vanilla have steeped for awhile, slow pour the cream into the eggs, stirring as you go. But do go slow. If your cream is too warm/hot and you go to quick, your yolks will scramble. If it helps you, add a few spoonfuls of the cream to the egg yolks, stir, add a little more, stir and eventually you can start pouring the cream. Once all the cream is in the eggs, make sure to scrap the pan. You want all those vanilla seeds from the pot into the mixture. Strain the final mixture through a fine mess strainer to remove any bits and bobs. That could be part of the vanilla pod. Or perhaps a stringy bit of egg.

**At this point, the custard can be sealed up and let in the fridge, which I did, for two days.

When you're ready to cook, pour the custard into the ramekins. The ramekins will need to be placed in a larger baking dish, which I have lined with a clean towel. Once the custard is in the ramekins and the pan in the oven, carefully pour warm water into the pan, at least halfway up the ramekins. This will facilitate a slow, steady, gently heating and cooking of the custard--guaranteeing a super smooth custard!

Bake! Once cooked, remove the ramekins to a tray and place in the refrigerator for several hours to become fully chilled. You don't want to serve warm or room temperature creme brulee. I think chilled is best!

To get the infamous crackle, bruleed topping, you need to sprinkle with sugar. I used three types of sugar. No reason, but something I did the first time I made creme brulee...still do it now. Make sure the topping is a 'lite' topping. Too much will make it very hard to have a thin, crisp crackled top...to as I say, not as I do!

I had too much sugar on my cremes. I couldn't get it all melted without truly burning the sugar, which you don't really want to do to much of. Any more than this in color, which start to get bitter. Dark brown, not black! So give the sugar a gentle hand. If you can, garnish the creme brulee with some fresh berries. Raspberries and blueberries are my favorite. They go great with the rich creme.

Despite the heavy hand with the sugar, my topping was light shattering glass! The custard was amazingly rich, soft, smooth, full of vanilla and just the right amount of sweet.

Of the six of us at dinner, only two of us finished our creme brulee. These bowls were a little too big. Each was 3/4 of a cup of custard. If we hadn't gorged ourselves on all the amazing vittles before hand, I'm sure all would have finished our dessert. That being said, one of the ramekins was licked clean at the end of dinner!!!


Le Cirque's Creme Brulee
from The Essential New York Times Cook Book by Amanda Hesser

Serves 6-8

4 cups heavy cream
1 vanilla bean, split, sees scraped out and reserved
Pinch of salt
8 large egg yolks
3/4 cup plus 2 TB granulated sugar
1/2 cup packed light brown sugar

1. Heat the oven to 300 degrees. Place eight 6-ounce ramekins in a roasting pan. Combine the cream, vanilla bean and seeds and salt in a saucepan set over low heat and warm for 5 minutes.

2. Gently whisk the egg yolks and granulated sugar in a large bowl. Gradually pour in the hot cream and stir gently to combine. Strain the custard into a pitcher; discard the vanilla bean and use a spoon to skim off any bubbles on the surface of the custard.

3. Pour the custard into the ramekins, filling them almost to the rim. Place the roasting pan in the oven and carefully pour warm water into the pan until it reaches halfway up the sides of the ramekins. Loosely cover the pan with aluminum foil. Bake until set, 1 to 1 1/4 hours. Remove the ramekins from the water bath and allow to cool.

4. Cover the ramekins individually and refrigerate for at least 3 hours, or for up to 2 days.

5. When ready to serve, heat the broiler. Uncover the ramekins and place them on a baking sheet. Top each with 1 TB of brown sugar, and using a metal spatula or your gingers, spread the sugar evenly over the custards. Broil the custards about 4 inches from the heating element until the sugar browns and caramelizes, 30 seconds to 1 minute. *Use a blowtorch, if you have one, to caramelize the sugar on top.

NOTES: I had 6 matching ramekins. I tested how much custard they could hold, by filling them with water, then measuring that amount. Each of my ramekins held 3/4 of a cup of the custard. That was exactly how much this recipe made. Six ramekins of 3/4 cup of custard.

As noted above, I used a blend of three sugars, granulated white sugar, brown sugar and turbinado sugar. Not necessary, but interesting.

Tuesday, August 17, 2010

Floating

I didn't intend to do naughty things when I went to the store the last time...but I did anyway!!!

The devilish ingredients!


Icy, creamy, decadent.


Sparkling & fizzy refreshment.


Caramel Ice Cream Float with Jones' Cream Soda.


Forgive me for I have sinned!

Saturday, July 17, 2010

Cobbling It Together

It happens every year. Usually it starts mid to late May and goes in fits and starts through July & August. It's my ongoing love affair with Summer. Warm weather, flowers; all good. Hot weather, humidity; all bad. But them something that speaks only in the language of summer comes along and woos me, and as soon as it seduces me it runs off and leaves me for another year. Leaving me sitting and soaking in the oppressive humidity.

Well, here we go. Peaches. Blueberries. Together in perfect harmony and lightly spiced.


Peach & Blueberry Cobbler
by way of Smitten Kitchen

Fresh peaches and blueberries from some of our local farmers. The peaches were stupidly juicy and just the right amount of tart. The blueberries were bursting with sweetness. Add a little flour, brown sugar, cinnamon, freshly grated nutmeg and a pinch of salt.

The ingredients for the buttermilk cornmeal topping. Mix until resembling lumpy sand. Add buttermilk. Spoon on top of the peach/berry mixture.

I gilded the lily...sprinkled a pinch of coarse demura sugar. Bake at 425 for about 20-25 minutes.

When your kitchen is full of the heady, fruity aroma, you know things are gonna be good. Allow to cool for a bit.

Dig in. Serve with some whipping cream, ice cream or even some yogurt if you like. We skipped all and just enjoyed the delirious fruit flavors and tender biscuit topping.

Ooops, all gone. Good thing I made four individual cobblers...I'll have one for breakfast, with the yogurt.


This recipe will make a 9x13 baking dish full of goodness. I halved the recipe and made four small ramekins...portion control!


Peach Blueberry Cornmeal Cobbler
Via Smitten Kitchen
Adapted from The Lee Bros. Simple Fresh Southern

For the fruit
1 1/2 (about 4 cups) pounds peaches, pitted and cut into slices*
1 pint (about 2 cups) blueberries, rinsed and dried
2/3 cup packed dark-brown sugar
2 tablespoons flour
2 tablespoons fresh lemon juice
1/4 teaspoon ground cinnamon
1/8 teaspoon freshly grated nutmeg
1/4 teaspoon salt

For the biscuit topping
3/4 cup (3 1/4 ounces) all-purpose flour
1/4 cup fine stone-ground cornmeal (yellow or white)
3 tablespoons dark brown sugar
1 1/2 teaspoons baking powder
1/4 teaspoon salt
3 tablespoons cold unsalted butter, cut into pieces
1/2 cup buttermilk

Preheat oven to 425°F (218°C).Toss peaches with blueberries, sugar, flour, lemon juice, cinnamon, nutmeg and salt in the bottom of a 2-quart ovenproof dish.

Make the biscuit dough: Stir together the flour, cornmeal, brown sugar, baking powder and salt. Cut the butter into the dry mixture with your fingertips, a fork or a pastry blender. Stir in buttermilk with a rubber spatula until a wet, tacky dough comes together.

Plop spoonfuls of the biscuit dough over the filling; don’t worry about covering entire surface. Bake until the cobbler’s syrup is bubbly and the biscuit tops are browned, about 20 to 25 minutes. Let cool slightly and scoop it into bowls. Top with whipped cream, vanilla ice cream, of if you’re having an accidental run-in with this cobbler before noon, plain yogurt.

*Want to peel your peaches? Here’s how: Cut a small “x” in the bottom of each peach. Dip them in boiling water for 30 seconds, and the skins will slide right off.

Monday, June 07, 2010

Grrr

Grrrr! My camera is dying. Well, as far as I'm concerned it's dead! Out of 90 photos I took on two recipes and one restaurant trip, I could use no more than 4 of them. Good thing the new camera is on its way. I should have it by Wednesday!!!! This new camera will be my 3rd since Eat With Me went into business. Oh the things I do for my art! ;o)


In terms of what went down this weekend. I went to one of my favorite joints for lunch on Saturday--Punk's Grill in Annapolis, MD. I wish it was closer, but I had nothing else going on, on Saturday afternoon, so the drive was nice. If you head to Annapolis, give it a shot. Don't judge it because it's at the mall. It's really good! When I have a working camera and head back there, I'll work on a post with more details about the place. In the meantime, if you go, try the Flat Iron Beef skewer! Mmmmm.


In other fun stuff news. A week or two ago a friend shared with me a recipe for Fluffernutter Cookies. All you need is three ingredients. 1 cup of Peanut butter, 1 cup of Marshmallow Fluff and 1 egg. Beat the PB and egg together, then fold in the fluff. Spoon onto a baking sheet. Bake at 350 for 12-15 minutes. Enjoy. They are good and stupid simple to make. A lighter textured peanut butter cookie. I can't taste the Fluff, but you can see it in some of the cookies. I got one dozen cookies from the batter, a nice amount for a snack, but not so many you'll feel like you're gaining 10 pounds by having them in the house.


On Sunday, I did chores around the house and read. When it came time for dinner was enjoying a major Buffy marathon, trying to finish season 3! So Good! I had planned to leave the house and go for dinner, but I just couldn't leave Buffy alone with the Mayor and Faith. She needed me! So, I decided to make a pizza. But what to do with it? I barely have anything in the house at this point. So...I made the dough, let it rise and it rose good! Must have been the right temp and the right humidity in the house for a good rise. I decided to try a white pizza--sort of. I mixed some softened butter with grated Parm, dried Italian herbs, garlic and fresh cracked pepper. I spread that on the dough, then sprinkled some shredded cheese on top (Montery Jack is what I had). Baked until golden brown. Slice and serve. It was good, but a wee bit dry and the garlic kept coming back to haunt me throughout the night. Easy to just keep eating though!

Wednesday, June 02, 2010

Blueberry Yogurt Cake

This was a super simple, delicious summery cake. Give it a shot. All you do is dump, mix, bake! This reminded me of a decadent blueberry muffin.


Blueberry Yogurt Cake
From Mom's Best Recipes

Batter:
1 box Duncan Hines white cake mix (do NOT mix according to box directions)
3 egg whites
1 cup milk
1 - 6oz. container fat free blueberry yogurt
2 cups blueberries; fresh or frozen*
small bowl of flour

Topping:
1 - 8oz. container fat free Cool Whip (thawed)
1 - 6oz. container fat free blueberry yogurt
1 cup fresh blueberries (optional)
1/4 cup blueberry syrup (optional)

In a small bowl add some flour--place the blueberries in the bowl of flour--toss to coat and set aside.

In a mixer add egg whites, milk and one container of yogurt--beat. Add cake mix--beat until smooth. Remove bowl from mixer--add flour coated blueberries--stir just until mixed using a wooden spoon. Pour batter into a greased 9 x 13 cake pan. Bake at 350 degrees for 35-45 minutes--test with a toothpick for doneness. Cool completely.

Topping: in a bowl add Cool Whip and one container of yogurt--stir. Add 1 cup fresh blueberries--stir OR add the blueberry syrup**. Spread the topping evenly over the cooled cake. Refrigerate until cold.

NOTES:
*I used frozen--which is acceptable when blueberries are not in season. If you use fresh, make sure to rinse and pick thru the berries for stems or other bits and pieces. Funny, I read the recipe a few times, then went to the store without writing anything down, I remembered everything, except fresh blueberries and...
**I didn't get extra blueberries for the topping, but we did have blueberry syrup. It added a little more sweetness, light color and additional blueberry flavor. It was nice.


Monday, April 05, 2010

Easter Cheesecake!

I made a cheesecake! This is only the second time I've made a cheesecake from scratch. I LOVE IT. It's actually pretty darn easy and this recipe works! All you need is some time, the proper amount of time for prepping (not much time at all!), baking (an hour), cooling (another hour or two) and then an overnight rest in the fridge.

You know I love Fine Cooking magazine and I really love the recipe builder they provided for cheesecake. They give you the step by step to make a basic cheesecake, then the instructions needed to mix it up a bit and create new flavors. The magazine gave something like 18-20 different versions. I kept drooling over the Cannoli Cheesecake. I had to have it! So, I made it. It was a little less Cannoli Cheesecake and a little more Cheesecake with orange and chocolate chips. Regardless, it worked!

Cannoli Cheesecake
or

Cheesecake w/orange & chocolate chips


I placed a cheese of parchment on the bottom of my springform pan. IF I wanted to transfer the cake to a serving plate, this would be necessary to help move the cake without it breaking. It will also help with sticking, should that be a problem.

The crust. The Cannoli recipe called for a crust made with Vanilla Wafers. My vanilla wafers were stale. I managed to dig a few out that were a little crunchy, so I used those, graham crackers and some ginger snaps. What the heck, a little fun doesn't hurt anyone. Grind them up in the food processor, add some sugar and butter.

Make sure the pan is put together properly and add the crumbs into the pan and press into the bottom and sides. I used a flat bottom measuring cup to help make the bottom and sides smooth. Very helpful tip. Bake for about 12 minutes, then cool.

Mix up the filling. 3 blocks of cream cheese, 1 cup of ricotta cheese, sugar, vanilla, orange zest (I think I used too much, which made the orange flavor much more dominate than I intended), chocolate chips and eggs. Make sure all the ingredients are whipped up nice and smooth before adding the eggs. If the eggs get whipped too much, there will be too much rising in the oven and extra cracking on the top of the cake. That's not a bad thing; it's asethetics. And a little texture; too much air and the cake will feel airy, I prefer cheesecake that is dense and creamy. Bake for about an hour until jiggly.

Fresh out of the oven. I got some crackage, but not bad. Not like the last cheesecake I made. Allow the cheesecake to rest on the counter for about 2 hours, so it can cool completely. Make sure it won't be moved around and otherwise disstressed while resting. Once cool, cover and place in the fridge for at least 8 hours. Overnight is best.

When you are ready to serve, carefully unmold. Make sure the crust doesn't stick to the pan anywhere. To slice. Use a large chef's knife that has been run under warm water. Slice, whip the knife clean, dip in warm water or whip with a hot, wet cloth and continue. A clean knife will give you nice clean slices. This cake can serve 10-12 people.

I garnished the cheesecake with some orange segments. The orange and chocolate played really well together. And with the creamy cheese flavors as well. Another topping suggestion might be a chocolate ganache, but that will certainly give you a rich cake. I think this was just about perfect; the right texture, flavor, sweetness. One slice filled me up and didn't make me feel gross and nasty afterwards. I'm very happy!


Cannoli Cheesecake
From Fine Cooking, April/May 2010, No. 104
Cheesecake; Variations on a
Serves 10-12

Step 1:

If going with a non-Cannoli variation...

Choose Your Ingredients and read thru the recipe completely before starting.
CLICK here for ideas.


Step 2:

Make the Crust

8 oz (2 cups) cookie crumbs (I used a combo of graham, vanilla wafers and ginger snaps)
3 TB granulated sugar
3 1/2 oz (7 TB) unsalted butter, melted

Position a rack in the center of the oven and heat the oven to 375F.

In a medium bowl, stir the cookie crumbs and sugar. Mix in the melted butter until the crumbs are evenly moist and clump together slightly. Transfer the mixture to a 9-inch springform pan and press evenly onto the bottom and about 2 inches up the sides of the pan (to press, use your fingers or a flat-bottomed measuring cup). Bake until the crust is fragrant and slightly darkened (this will be more obvious with lighter crumbs, but even even the ginger and chocolate crumbs will darken a bit), 9 to 12 minutes. Let the pan cool on a rack. Lower the oven temperature to 300F.

Step 3:

Make the Filling

3 8-oz packages of cream cheese, at room temperature
1 cup of ricotta cheese
2 TB all-purpose flour
Pinch of table salt
1 ¼ cups granulated sugar
1 TB pure vanilla extract
1 TB orange zest
1/2 cup miniature chocolate chips
4 large eggs, at room temperature


In a stand mixer fitted with the paddle attachment, beat the cream cheese and ricotta, flour and salt on medium speed, scraping down the sides of the bowl and the paddle frequently, until very smooth and fluffy, about 5 minutes. Make sure the cheese has no lumps. Add the sugar and continue beating until well blended and smooth. Add the vanilla, orange zest and chocolate chips, and beat until blended, about 30 seconds. Add the eggs one at a time, beating just until blended. (Don’t overbeat once the eggs have been added or the cheesecake will puff too much and crack as it cools.) Pour the filling into the cooled crust and smooth the top.

Step 4:

Bake the cake

Bake at 300F until the center jiggles like Jell-O when nudged, 55-65 minutes. The cake will be slightly puffed around the edges, and the center will still look moist. Set on a rack and cool completely. Cover and refrigerate until well chilled, at least 8 hours and up to 3 days.

Step 5:

Garnish

If you like, you can garnish the cheesecake with orange segments, powdered sugar or a chocolate ganache.

Tuesday, March 09, 2010

White Chocolate-Cherry-Pistachio

The other day I made my Cherry Blossom Festival Cookies for an informal cookie contest at work. This time around I added some chopped pistachios to the mix as well. Delicious.

Monday, February 15, 2010

Blueberry Cream Pie

There was pie the other day. Very simple, pre-made crust. Frozen berries. A little whipping and a little improvising and we had pie. Very tasty, but the texture was way off...sad sad sad frozen berries. Bummer. But again, the taste was great. Will certainly try it again with fresh blues.


Blueberry Cream Pie

Frozen blueberries mixed with a little sugar and some warm spices. Cinnamon, allspice, cloves, cardamom. This wasn't a part of the recipe, but I thought it would be fun. It was!

The blues are then mixed with a "cream" filling. Sour cream, cream cheese, eggs, vanilla and sugar.

Pour into a pre-made pie crust. Bake for awhile.

Before the pie is done, remove and sprinkle on the topping.

Remove from the oven and let cool. Refrigerate before serving so it's nice and chilled and it sets.

Click here for the recipe.

Sunday, February 14, 2010

Treats


Made a quick batch of Oatmeal Cinnamon Chip treats the other day. Under bake the treats by a minute or two for super chewy goodness.

Tuesday, February 02, 2010

Community Minded Cookies

The Women's Bean Project
Since 1989 we have been helping women break the cycle of poverty and unemployment. We are a nonprofit organization that teaches job readiness and life skills for entry-level jobs through employment in our gourmet food production business. Women come with the goal of transforming their lives and moving toward self sufficiency.


For Christmas I received a package of cookie mix from The Women's Bean Project. Oatmeal Chocolate Chip. I thought I would share the information here. From my understanding, the WBP is a great organization enabling woman to better their lives by helping to lift them out of poverty and unemployment.


You get almost all you need for tasty treats. Just add butter and an egg.

Chewy and Delicious!

Good for your belly, good for the community and good for your soul.


The tools gained during their stay at the Bean Project empower women to create better lives for themselves, provide their families with hope, and contribute to a stronger community.

Thursday, January 07, 2010

Your Peanut Butter is in my Chocolate

I was craving a sweet treat during the holidays and thought I would get myself together and make some Chocolate Covered Peanut Butter Balls. I haven't had them in years. They were always available during my family's Christmas get-togethers. To make them, I took several recipes and mixed them together to this version. They are good, exactly the way I remember them. But I need to fix one thing. The chocolate didn't have a snap when you bite into it, it was very soft. Could have been the chocolate? A guest at our house said it was the missing paraffin wax...could be. I remember it being used. Will try that next time. In the meantime...


I pulled out my fancy Double Boiler to melt the chocolate and keep it smooth for dipping.


After mixing the peanut butter together, I used a small scoop to make round balls, then I inserted toothpicks to make coating the balls in chocolate easier. Remove the picks when you set the covered balls on the wax paper and dab some chocolate over the hole.


Keep the treats in the fridge, or they become soft and may become melty; especially if you have a warm house.

Chocolate Covered Peanut Butter Balls

2 cups Peanut Butter (I prefer Skippy Extra Crunchy)
1/2 cup Butter, room temperature
1 TB Brown Sugar
1 cup Crisp Rice Cereal, crushed
2 1/2 cups Powdered Sugar
2 cups Milk Chocolate-Chips or Blocks
1 TB Shortening (or maybe food grade paraffin wax?)

Mix the peanut butter, butter and brown sugar until well blended. Add the crushed rice cereal, blend well. Mix sugar until smooth.

Scoop peanut butter mixture into small-ish balls, no bigger than an inch wide. Roll into balls. Insert a toothpick into each one and place in the fridge to firm up. 30 minutes to an hour.

Melt chocolate and shortening in a double boiler or in the microwave until smooth. Keep warm, but off of the heat.

Using the toothpick and a spoon, dip and cover each ball with chocolate. Allow excess to drip off; place on a wax paper covered sheet. Place in the fridge to chill and allow the chocolate to fully set. When chocolate is firm, covere with wax paper and plastic wrap to keep fresh.