Showing posts with label French. Show all posts

Monday, January 31, 2011

Creme Brulee!

Hey guess what? My tiny little blog that I have been operating since 2005. My tiny little blog that over the past year and a half to two years has averaged only 60-75 visitors a day. Well, my tiny little blog has surpassed 100,000 visitors, since I started tracking in 2006! Woo hoo!!! Thanks readers. A special thanks to DCBlogs for featuring my post, which in turn pushed me over 100,000!

So a few weekends ago, I had this awesome dinner party. I don't pull out all the stops that often, but this time I did. After treating people to fun nibbles to start, we sat down for a great dinner (that post is coming down the line!) Of course at this point, we were stuffed to the gills. No reason to eat anything else. But that would be foolish. So dessert is a MUST! And what a perfect dessert it was!!!

Le Cirque's Creme Brulee
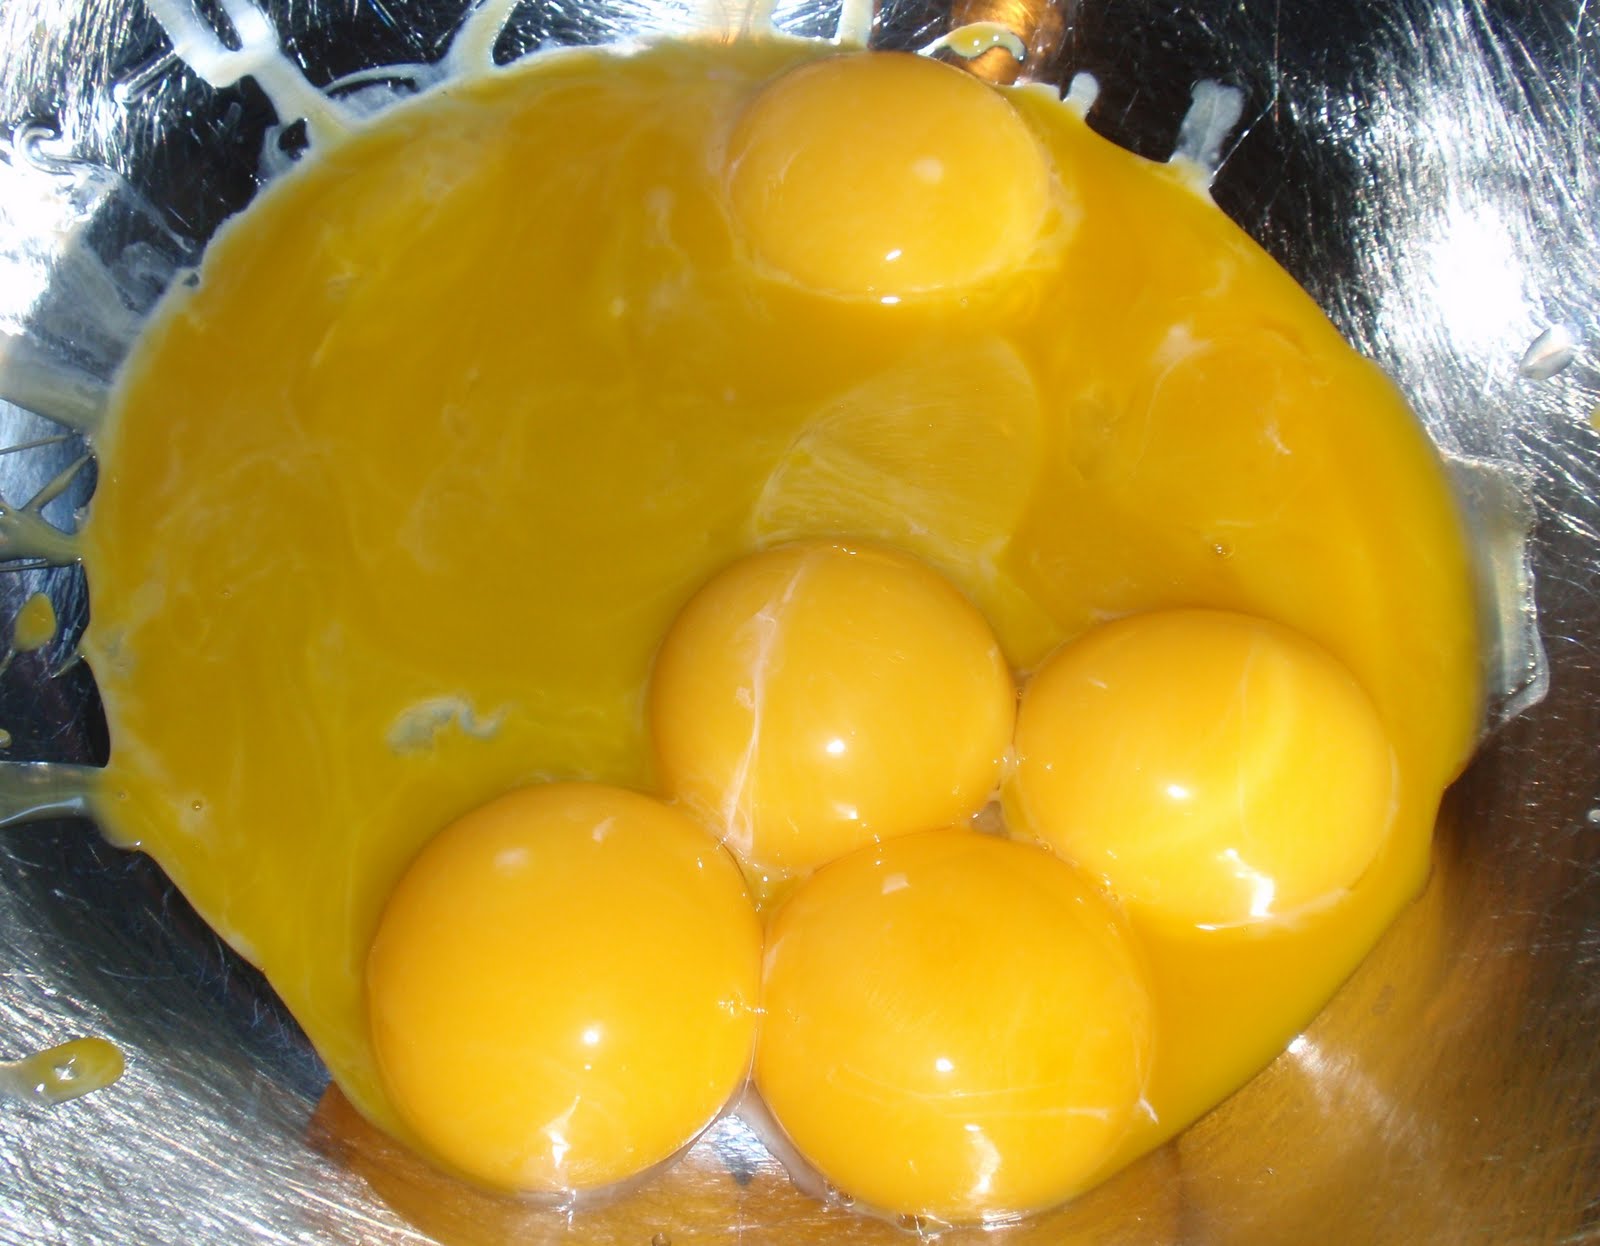
Creme Brulee starts with the best eggs you can get. Farm fresh is best! Organic and/or free range is the next best. But whatever, make sure they are fresh and the best you can get. The egg whites can be frozen and saved for a later use, perhaps a pavlova.

Mix the egg yolks with sugar. That amazing orange yolk will turn to a beautiful pale yellow.

Of course, like the eggs, get the best heavy cream you can. I wish I had easy access to a dairy. Alas, I went with an organic heavy cream from my local market. Heat the cream with vanilla bean/seeds. And if your naughty and have a good quality vanilla extract, a little extra shot will shoot your creme brulee to the moon! But don't tell anyone, that's our little secret.

Once the cream and vanilla have steeped for awhile, slow pour the cream into the eggs, stirring as you go. But do go slow. If your cream is too warm/hot and you go to quick, your yolks will scramble. If it helps you, add a few spoonfuls of the cream to the egg yolks, stir, add a little more, stir and eventually you can start pouring the cream. Once all the cream is in the eggs, make sure to scrap the pan. You want all those vanilla seeds from the pot into the mixture. Strain the final mixture through a fine mess strainer to remove any bits and bobs. That could be part of the vanilla pod. Or perhaps a stringy bit of egg.

**At this point, the custard can be sealed up and let in the fridge, which I did, for two days.

When you're ready to cook, pour the custard into the ramekins. The ramekins will need to be placed in a larger baking dish, which I have lined with a clean towel. Once the custard is in the ramekins and the pan in the oven, carefully pour warm water into the pan, at least halfway up the ramekins. This will facilitate a slow, steady, gently heating and cooking of the custard--guaranteeing a super smooth custard!

Bake! Once cooked, remove the ramekins to a tray and place in the refrigerator for several hours to become fully chilled. You don't want to serve warm or room temperature creme brulee. I think chilled is best!

To get the infamous crackle, bruleed topping, you need to sprinkle with sugar. I used three types of sugar. No reason, but something I did the first time I made creme brulee...still do it now. Make sure the topping is a 'lite' topping. Too much will make it very hard to have a thin, crisp crackled top...to as I say, not as I do!

I had too much sugar on my cremes. I couldn't get it all melted without truly burning the sugar, which you don't really want to do to much of. Any more than this in color, which start to get bitter. Dark brown, not black! So give the sugar a gentle hand. If you can, garnish the creme brulee with some fresh berries. Raspberries and blueberries are my favorite. They go great with the rich creme.

Despite the heavy hand with the sugar, my topping was light shattering glass! The custard was amazingly rich, soft, smooth, full of vanilla and just the right amount of sweet.

Of the six of us at dinner, only two of us finished our creme brulee. These bowls were a little too big. Each was 3/4 of a cup of custard. If we hadn't gorged ourselves on all the amazing vittles before hand, I'm sure all would have finished our dessert. That being said, one of the ramekins was licked clean at the end of dinner!!!


Le Cirque's Creme Brulee
from The Essential New York Times Cook Book by Amanda Hesser

Serves 6-8

4 cups heavy cream
1 vanilla bean, split, sees scraped out and reserved
Pinch of salt
8 large egg yolks
3/4 cup plus 2 TB granulated sugar
1/2 cup packed light brown sugar

1. Heat the oven to 300 degrees. Place eight 6-ounce ramekins in a roasting pan. Combine the cream, vanilla bean and seeds and salt in a saucepan set over low heat and warm for 5 minutes.

2. Gently whisk the egg yolks and granulated sugar in a large bowl. Gradually pour in the hot cream and stir gently to combine. Strain the custard into a pitcher; discard the vanilla bean and use a spoon to skim off any bubbles on the surface of the custard.

3. Pour the custard into the ramekins, filling them almost to the rim. Place the roasting pan in the oven and carefully pour warm water into the pan until it reaches halfway up the sides of the ramekins. Loosely cover the pan with aluminum foil. Bake until set, 1 to 1 1/4 hours. Remove the ramekins from the water bath and allow to cool.

4. Cover the ramekins individually and refrigerate for at least 3 hours, or for up to 2 days.

5. When ready to serve, heat the broiler. Uncover the ramekins and place them on a baking sheet. Top each with 1 TB of brown sugar, and using a metal spatula or your gingers, spread the sugar evenly over the custards. Broil the custards about 4 inches from the heating element until the sugar browns and caramelizes, 30 seconds to 1 minute. *Use a blowtorch, if you have one, to caramelize the sugar on top.

NOTES: I had 6 matching ramekins. I tested how much custard they could hold, by filling them with water, then measuring that amount. Each of my ramekins held 3/4 of a cup of the custard. That was exactly how much this recipe made. Six ramekins of 3/4 cup of custard.

As noted above, I used a blend of three sugars, granulated white sugar, brown sugar and turbinado sugar. Not necessary, but interesting.

Wednesday, January 26, 2011

French Onion Tartlets

At our recent dinner party, I wanted to greet the guests with a bubbly drink and a little nosh. One of the nosh items was something I came up, sort of on the fly. I played around with making an onion & sage tart, but I just wasn't feeling it. Being a French themed dinner, I also really wanted onion soup, but didn't want to go over board on the. What if...I could make incorporate the two?

French Onion Tartlets!!!

I started with two large sweet onions. They were diced and tossed in a non-stick skillet with butter, thyme, bay leaf, salt and pepper. Cook slow and low for about 45 minutes. The onions will caramelize and reduce down.

After the onions cooked down, I added a quarter cup of a dry white wine. I allowed that to mix in and simmer do to nothing. Next was some apple juice--I'd have preferred cider, but I didn't have it. Simmer that down to nothing. Finally I added some beef stock and simmered that down, about 1/2 cup. You don't want this to actually be soup. A nice thick consistency will be best. Once I had the consistency I wanted, I stirred in a tablespoon of cider vinegar. At the moment, that seemed like a mistake, but the vinegar made the flavors pop later on! I placed the mixture into a bowl and kept it in the fridge for about 3 days before I continued the tartlets the day of the dinner party.


Now...how to make the tarts? Use the recipe here, roll out and cut into small circles with a biscuit cutter, about 2-2 1/2 inch diameter...it might have been 3 inches??? Carefully place the circles into a mini-muffin tins. I forgot, but you should prick the pastry with a fork. You'll need to bake these in the oven for about 15 minutes...350 degrees. They will be puffy and golden brown. Allow to cool.

Each tart shell took about 1 full teaspoon of the onion mixture. I topped each tartlet with a small bit of shredded mozzarella. I would have preferred Gruyere, but I forgot to get some at the store. Put them back in the oven, 350 again, for about 10-15 minutes. This allowed the onion mixture to heat back up and the cheese to melt.

These were tasty little devils. I made enough for at least 12 people, but the 6 of us finished almost all of them off!!! Serve them hot and with a glass of wine. Enjoy.

Thursday, February 25, 2010

Poulet au Poivre

I've been craving pepper lately. Not bell peppers or other chilis, I'm talking black pepper. And yes, I use it on everything, but sometimes you have to go a bit further. Using a very common grocery store item, chicken thighs, I adapted this Duck au Poivre recipe into Poulet au Poivre. The only substitute was chicken thighs for duck breasts. I added about a tablespoon of flour to the crushed black pepper to help with the coloring and coating of the chicken.


Poulet au Poivre
So, as mentioned, I added a little flour to the chicken to help the pepper stick, give a little protection to the chicken from the heat and to assist the sauce in thickening a tiny extra bit. Sear until golden on both sides and then cover and cook over medium for about 10 minutes.

Remove the chicken and add 1 minced shallot and a pat of butter.

Now the fun! Remove the pan from the stove and pour in a quarter cup of liquor, I used a Greek brandy, as it's what I had. Tilt the pan to the flame and FLAME ON! Becareful. Keep the liquor bottle away from the stove and make sure your fire extinguisher is nearby. The flame will go away on its own then the alcohol burns off.

Which will leave you with a beautiful, caramel colored, richly flavored sauce. Stir in some broth and a drizzle of cream (optional).

Our pantry is empty. Drizzle the sauce over the chicken. I would have loved this more with a rice pilaf or wild rice, but plain old white rice was good. Oh...risotto would have been decadent! I need to go buy some vegetables...

Monday, February 01, 2010

Baked Eggs in Ramekins

This weekend, after sleeping in a bit and hoping to have a relaxed day, I started making Baked Eggs in Ramekins. I've not made them before, but walked into the library, grabbed Mastering the Art of French Cooking and seemed to know exactly where I was going. It was a little surreal, honestly. Back to the kitchen where I started gathering my supplies. And I was off.


You need a pan that can hold boiling water and you need oven safe dishes for the eggs. Ramekins are small, oven safe, ceramic bowls. Some are made of glass. So the bowls don't slid around, I put a sheet of paper towel in the bottom. Once the water is in place, all is good.


Here's one way I messed up the recipe. You are supposed to bring the water to a boil, get the ramekins nice and hot, add the cream. When the cream is warm, you add the eggs. I didn't boil the water, in the pan. I boiled it in a teapot, then poured it in the pan. It mostly worked, but not exactly. But regardless, you put a smidge of cream in the bottom of the ramekin. I added a pinch of shredded cheddar cheese and freshly chopped parsley.

I did two eggs per ramekin. I cracked them into a separate bowl first, then added them to the ramekins.

Before baking, add a final smidge of cream and a little butter on top. Bake until the eggs set. They will finish cooking a bit at the end after you take them out of the oven.

Eggs baked in ramekins with buttered toast.


These eggs are decadent. Even though I over cooked my eggs by a few minutes (they didn't seem done after the recommended time-because I wasn't boiling the ramekins!), regardless, they were delicious. The cream and butter, plus the pinch of cheese, all played nicely with the eggs. I will make these again! They are simple and full of countless options. Wanna add some chopped veggies? Do it! Spinach. It would work. Cut back on the cream and butter? Maybe a little bit, but not too much; the cream helps to protect the eggs from too much heat, too fast, which would make a tough egg. The butter you can cut back on, but the flavor is very nice. Add a dash of hot sauce. Just about anything you would do with eggs, you can do here!


The following is my version of Julia Child's recipe.

Eggs Baked in Ramekins
Per Person:
2 eggs
2-3 TB heavy cream
1 tsp shredded cheese of your choice
1 tsp chopped parsley or herbs of your choice
1 tsp butter

Preheat oven to 375.

Lightly coat the inside of the ramekin with butter.

Place ramekins in a paper towel lined baking pan and pour boiling water 1/2 way up the sides of the ramekins. Pour 1-2 TB heavy cream in the bottom of the ramekins, add 1/2 the herbs and the cheese. Carefully place the eggs in the ramekins. Pour the final 1 TB of heavy cream, the remaining herbs and butter on top of the eggs.

Bake in the oven for 10-14 minutes until set to desired consistency. Add a pinch of salt and fresh cracked pepper to the eggs. Serve immediately!

Thursday, December 10, 2009

Julia Child's Beouf Bourguignon

Here's some more of Thanksgiving 2009 prep. Julie Child's Beouf Bourguignon. So Good! I followed the recipe, almost exactly. Per one of my guests dietary restrictions, I used beef bacon instead of pork bacon...a fine substitute.


Start with the beef. I bought two large roasts and cut them into smaller pieces and cut some of the fat off as I went.


Carrots and Onions.


After the beef has been browned, you add some flour. This will help thicken the sauce as the stew cooks.


Because I needed my pans for multiple dishes, I seared the meat in a large skillet, then poured the liquid in to deglaze the pan, then I poured the whole mess into a foil baking pan.


Ready to go in the oven. You can tell in this photo how "lite" the sauce is, having not thickened at all.


After several hours. The sauce changes colors, the red dissipates, and becomes a dark brown. The meat was super tender. Remove the meat and strain the sauce. Discard the veggies.


I made the Beouf on Monday night, so serve on Thursday. Here we go, all ready for the fridge. I waited to do the onions and mushrooms the day of. Once they were braised and sauted, I added them to the beef and sauce and placed in a warm oven for about an hour or so while we enjoyed the first few courses of dinner.


Beouf Bourguignon served with creamy mashed potatoes. Amazing. But so rich and I was already so full from the first three course, I didn't really enjoy it!!! I still hate mushrooms. But I DID cook with them. In the future, will probably serve this with buttered noodles or boiled potatoes.


Julia Child's Boeuf Bourguignon:
  • 6 ounces bacon
  • 1 Tbsp. olive oil or cooking oil
  • 3 pounds lean stewing beef , cut into 2-inch cubes
  • 1 sliced carrot
  • 1 sliced onion
  • 1 tsp. salt
  • 1/4 tsp. pepper
  • 2 Tbsp. flour
  • 3 cups full-bodied, young red wine , such as a Chianti
  • 2 to 3 cups brown beef stock or canned beef bouillon
  • 1 Tbsp. tomato paste
  • 2 cloves mashed garlic
  • 1/2 tsp. thyme
  • Crumbled bay leaf
  • Blanched bacon rind
  • 18 to 24 small white onions , brown-braised in stock
  • 1 pound quartered fresh mushrooms , sautéed in butter
  • Parsley sprigs
Remove rind from bacon, and cut bacon into lardons (sticks, 1/4 inch thick and 1 1/2 inches long). Simmer rind and bacon for 10 minutes in 1 1/2 quarts of water. Drain and dry.

Preheat oven to 450 degrees.

Sauté the bacon in the oil over moderate heat for 2 to 3 minutes to brown lightly. Remove to a side dish with a slotted spoon. Set casserole aside. Reheat until fat is almost smoking before you sauté the beef.

Dry the stewing beef in paper towels; it will not brown if it is damp. Sauté it, a few pieces at a time, in the hot oil and bacon fat until nicely browned on all sides. Add it to the bacon.

In the same fat, brown the sliced vegetables. Pour out the sautéing fat.

Return the beef and bacon to the casserole and toss with the salt and pepper. Then sprinkle on the flour and toss again to coat the beef lightly with the flour. Set casserole uncovered in middle position of preheated oven for 4 minutes. Toss the meat and return to oven for 4 minutes more. (This browns the flour and covers the meat with a light crust.) Remove casserole, and turn oven down to 325 degrees.

Stir in the wine, and enough stock or bouillon so that the meat is barely covered. Add the tomato paste, garlic, herbs, and bacon rind. Bring to simmer on top of the stove. Then cover the casserole and set in lower third of preheated oven. Regulate heat so liquid simmers
very slowly for 2 1/2 to 3 hours. The meat is done when a fork pierces it easily.

While the beef is cooking, prepare the onions and mushrooms. Set them aside until needed.

When the melt is tender, pour the contents of the casserole into a sieve set over a saucepan. Wash out the casserole and return the beef and bacon to it. Distribute the cooked onions and mushrooms over the meat.

Skim fat off the sauce. Simmer sauce for a minute or two, skimming off additional fat as it rises. You should have about 2 1/2 cups of sauce thick enough to coat a spoon lightly. If too thin, boil it down rapidly. If too thick, mix in a few tablespoons of stock or canned bouillon. Taste carefully for seasoning. Pour the sauce over the meat and vegetables. Recipe may be completed in advance to this point.

For immediate serving: Covet the casserole and simmer for 2 to 3 minutes, basting the meat and vegetables with the sauce several times. Serve in its casserole, or arrange the stew on a platter surrounded with potatoes, noodles, or rice, and decorated with parsley.

For later serving: When cold, cover and refrigerate. About 15 to 20 minutes before serving, bring to the simmer, cover, and simmer very slowly for 10 minutes, occasionally basting the meat and vegetables with the sauce.

Wednesday, December 09, 2009

Soupe à l’Oignon Gratinée

I continue to be a slow poke in posting things to the blog. Perhaps its my new way of doing business? I hope not...

Anyway, in continuing to share Post-Thanksgiving recipes, let's move on to the French Onion Soup.

To lessen the amount of time spent in front of the stove caramelizing onions, I use a roasting pan and the oven! Make sure you have a good quality roasting pan for this...


We need some butter.

I used 10 large onions for my soup. Two red ones and 8 sweet Vidalia onions.

The onions will start to sweat in the oven.

I could have stopped here, but I felt the onions weren't dark enough yet.

Here we go. Caramelized Onions!!!

Now, I put the roasting pan on the stove top to help dissolve the sugars and get the onions slopping around. Add the various types of broth, wine and cider.

Once the roasting pan is cleaned up, I simmer the soup in the big pot with a bouquet garni and start tasting to adjust the seasoning.

The soup simmers for about 20-30 minutes, developing the flavors. Notice that color! Dark and souper rich! I had to add additional broth prior to serving, as the soup almost had the texture of a thick stew.

Serve the soup in an oven safe bowl, top with bread and grated Gruyere cheese. Place under the broiler until golden and bubbly! Serve hot!!!


French Onion Soup
10 large onions (combination of red and sweet)
4 TB unsalted butter
Salt/Pepper
2 cups dry white wine
1 cup beef broth
1 1/2 cup chicken broth
1 cup unfiltered apple cider
Fresh thyme, Bay leaf and Parsley wrapped in cheese cloth for a Bouquet Garni

Fresh Bread cut into 1/2-1 inch pieces
1-2 cups grated Gruyere cheese

Preheat the oven to 350, place the roasting pan in the oven while you prep the onions.

Slice onions in half from end to end, the slice each half, in half, finely slice into thin slices. When the onions are sliced, remove the roasting pan from the oven and add the butter. The butter will melt, add onions and stir to coat with the butter. Season with salt and pepper.

Place onions in the oven for 30 minutes. Remove and stir. Return to the oven for one hour. Check about half way through the cooking time. After an hour, stir and return to the oven for another 30-60 minutes until the onions have reduced and taken on a dark, rich color.

Place the roasting pan over two burners on your stove top. Over high heat, add the wine. Stir to incorporate, bring to a boil and reduce by half. Add the broth and cider. Scrap up any bits of onion stuck to the pan. Pour all of the onions and broth into a large pot.

Place pot of low heat and add the Bouquet Garni, bring a low simmer, cover and cook for 20-30 minutes. Adjust seasoning as needed.

To serve, pour soup into oven safe bowls. Top with bread croutons and grated cheese. Place under a broiler until golden brown and delicious. Garnish with chopped parsley and serve hot.

Wednesday, November 25, 2009

A French Tease

A sampling of what's coming down the line for tomorrow's dinner...

Perfect! Onions caramelized in the oven. A delicious base for the richest onion soup you can imagine. Next step, add stock, broth, cider, wine, herbs and simmer.

Beouf bourguignon after 3 hours in the oven. Next step, strain out the goodies and add braised pearl onions and mushrooms. Will be served on mashed potatoes.


Stay Tuned for more goodies...

Friday, September 04, 2009

Two Meals

Two fairly tasty meals the past two nights. The first was one I realized I never put the recipe up...again, I don't have the recipe in front of me...but it's really. Braised chicken thighs with shallots, fennel and bacon. This time I added some potato for some starchy goodness. VERY GOOD. This will be an amazing meal in the winter!


Thursday night's meal was also a recipe I've made before, Pepper Steak. This batch was a bit on the spicy side, but at the end of the day, you want some of the extra spice to cut through the sweetness of the Asian sauces.

Tuesday, June 30, 2009

Grill Roasted

The other night I took a stab at adapting an oven roasted chicken recipe and putting it on the grill. The oven roasted recipe has delicate flavors and I wasn't sure how it was going to hold up on the grill. Would the fire, intense heat & smoke suffocate the gentle aromatic herbs and subtle sweetness. Well, I'll be dipped in honey, it didn't! Dinner was great!

Grill Roasted Provencal Chicken
with Honey and Thyme

Here's the original recipe.

To start, I brined two pieces of chicken. They were chicken quarters, thighs and legs. The brining solution was about 3-4 cups of water, 1/4 cup kosher salt, 2 TB honey, 1 tsp dried lavender flowers and 1 TB Herbes de Provence. Soak the chicken for an hour. When ready to cook, drain, rinse and pat dry.


Before you begin grilling, make your glaze. Herbes de Provence, lemon zest, shallots, fresh chopped thyme, honey, lemon juice and olive oil. (Quantities in the original recipe linked above)


Brush the glaze on the chicken and place on the grill. Brush the glaze each time you flip. For the grill roasting, I put the charcoal in two sections down the sides of the grill, leaving an emtpy section in the middle. Don't place the chicken directly over the coals or it might start to burn (remember there is honey in the glaze). My chicken took about 20-30 minutes to cook. Keep covered for most of the cooking time.


At the very end, I put some carrots that I had par-boiled onto the grill to get some char on them. There were just the right texture and the high heat carmelized them just a touch. Great!

I was surprised to see the tender lavender and thyme flavors stick around after roasting on the grill. The lavender was subtle, which is very important. It it becomes too strong you feel like you're eating potpourri. I've decided I won't cook chicken on the grill that isn't brined. It can become to tough and dry. Brining allows for making mistakes and still gives you a great dinner! Woo Hoo.

Tuesday, March 31, 2009

Insert Snooty French Laugh

Remember when I had this craving several weeks ago? Yeah, that scratch got scritched!

Woo hoo!!!

My version of Frisée Aux Lardons, sans frisée!

The dressing; a lemon Chardonnay vinaigrette! Tasty.


The dressed salad with bacon, home-made croutons and a side of oven pomme frites.


Top with a soft poached egg. Add some freshly cracked pepper and pinch of salt.


Dig In! The preferred salad would be frisée, but Giant didn't have any-go figure, so I got a bag mix of baby arugula mix, which had a small bit of frisée in it. It worked...and I'm not fond of arugula.


Lemon Chardonnay Vinaigrette
1 small shallot finely diced, about 1 TB
pinch of sugar
1 tsp lemon juice
1-2 tsp Chardonnay vinegar (see 2nd photo above for the bottle)
2-4 TB olive oil
salt/pepper to taste

Whisk together, taste and adjust seasoning as necessary. The quantities are good faith estimates, as I didn't measure. This was enough dressing for one bag of salad mix, which as a main course, served the two of us.

As for the pomme frites...I sliced the potato and...get this...tossed it in some of the bacon fat...yeah, that's right...bacon fat...the roasted until crispy! Tee hee...


Enjoy!